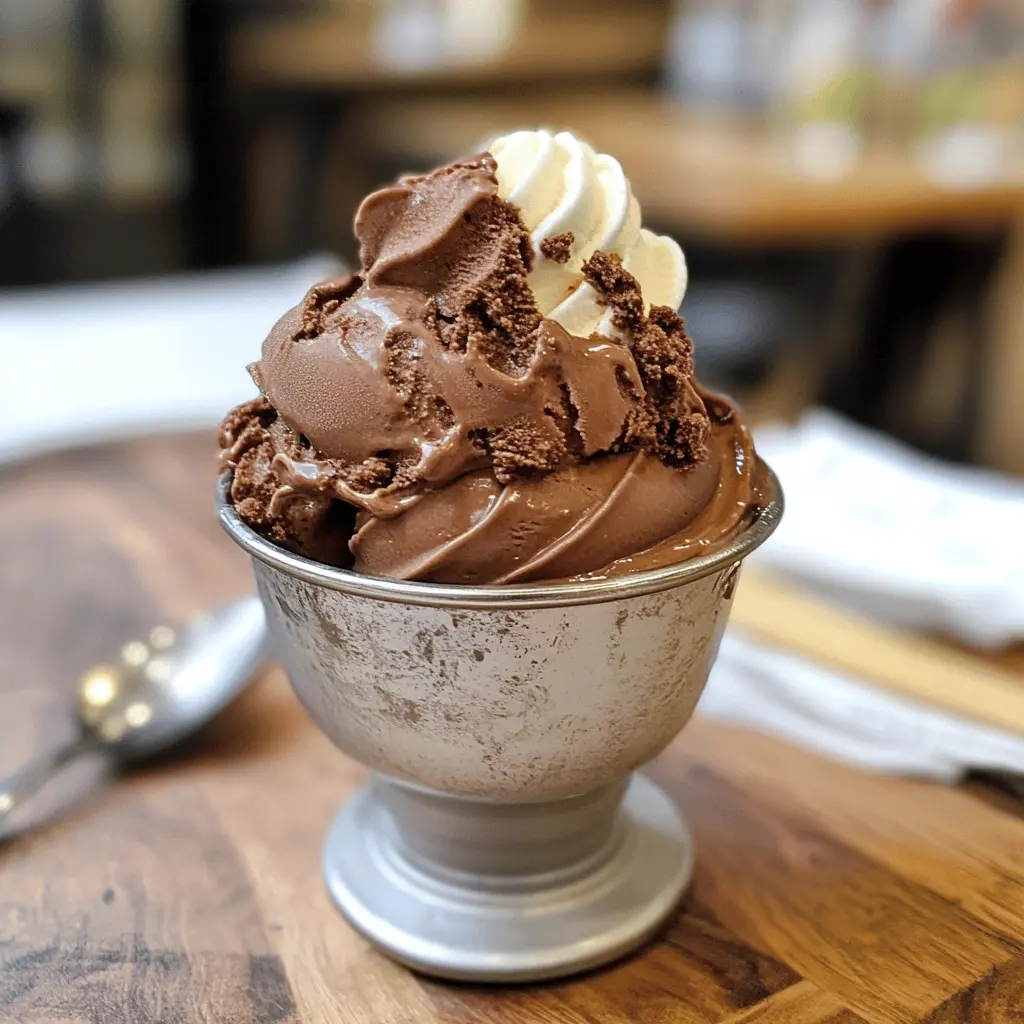
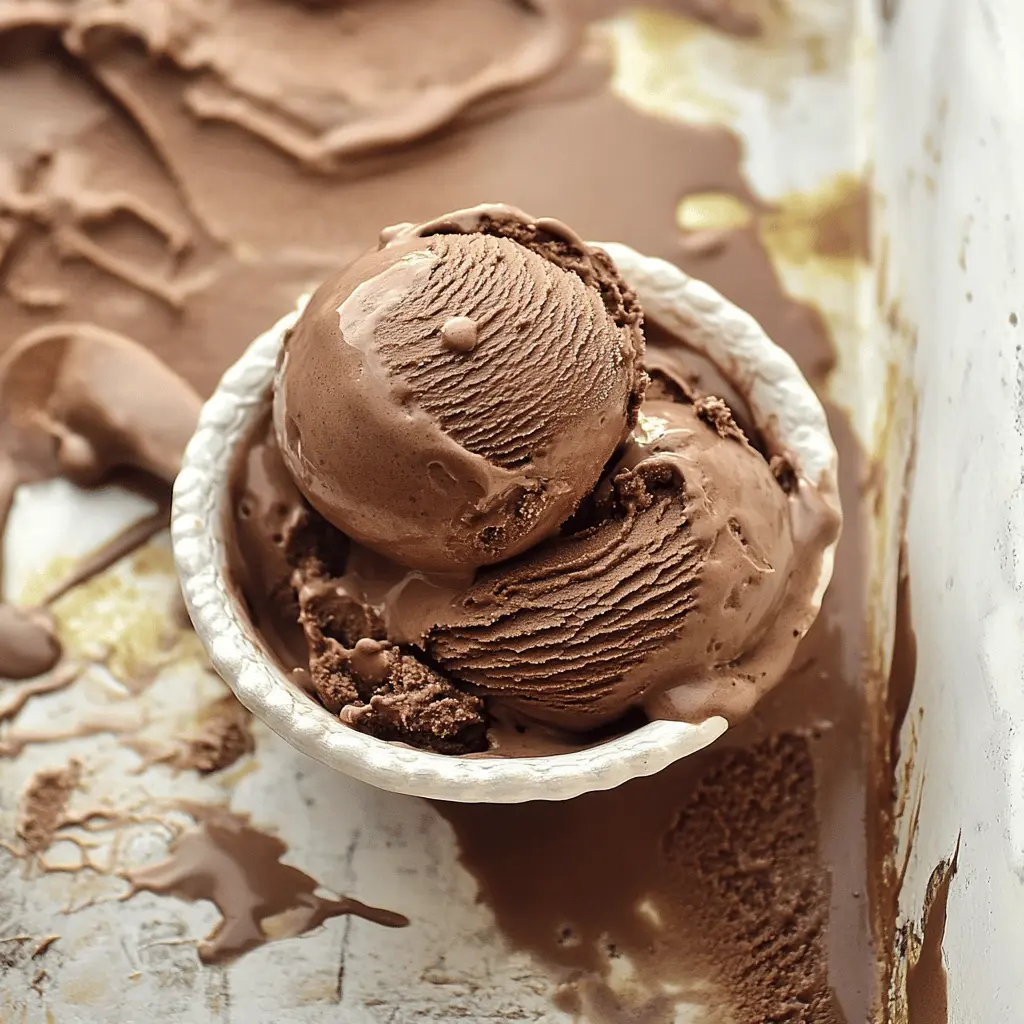
This creamy chocolate ice cream is rich and satisfying, perfect for hot days or whenever you crave a sweet treat. Made with simple ingredients, it whips up quickly!
Honestly, there’s nothing better than a big scoop of this chocolate goodness. I like to top mine with whipped cream and a cherry. It’s a little joy in every bite! 🍦
Key Ingredients & Substitutions
Heavy Cream: This is crucial for that creamy texture. If you’re looking for a lighter version, you can use half-and-half, but the end result will not be as rich. Coconut cream is a great non-dairy substitute!
Whole Milk: Whole milk adds a nice creaminess. If you’re looking for a lower-fat option, 2% milk works too. You can also use almond or oat milk for a dairy-free version, but it’ll change the taste a bit!
Granulated Sugar: This sweetens the mixture. If you want a healthier alternative, consider using coconut sugar or honey (but the latter will alter the texture). I personally love using brown sugar for a deeper flavor.
Cocoa Powder: Unsweetened cocoa powder gives a rich chocolate flavor. Dutch-processed cocoa can be used as a substitute for a smoother taste, but it may change the color slightly. I lean towards natural cocoa for its stronger taste.
Chocolate Chips: Semisweet chocolate chips add richness. You can use dark chocolate for a less sweet option. For a dairy-free version, look for vegan chocolate chips!
How Do I Achieve the Perfect Churn?
Churning the mixture is vital to get that smooth, creamy texture. Make sure your ice cream maker’s bowl is completely frozen before you start. Here are a few tips:
- Chill your base mixture well before churning; this can take around 2 hours in the fridge.
- Pour the chilled mixture into the ice cream maker while it’s running. This helps incorporate air, making your ice cream fluffy.
- Don’t skip the freezer step after churning! It allows the ice cream to firm up, resulting in a scoopable texture.
Happy ice cream making! You’ll love how creamy and luxurious this chocolate ice cream turns out. Enjoy each scoop! 🍦
Easy Classic Chocolate Ice Cream Recipe
Ingredients You’ll Need:
- 2 cups heavy cream
- 1 cup whole milk
- 3/4 cup granulated sugar
- 1/2 cup unsweetened cocoa powder
- 1/2 cup semisweet or bittersweet chocolate chips or chopped chocolate
- 1 teaspoon pure vanilla extract
- A pinch of salt
How Much Time Will You Need?
This chocolate ice cream recipe takes about 15 minutes of active preparation time. After that, you’ll need to chill the mixture for at least 2 hours. Then, churn it in your ice cream maker for about 20-25 minutes. Finally, let it freeze for about 4 hours to fully set. In total, you should plan on around 6-8 hours for the entire process, including chilling and freezing time.
Step-by-Step Instructions:
1. Mix the Dry Ingredients:
In a medium saucepan, take the cocoa powder, granulated sugar, and a pinch of salt. Whisk them together until they’re well combined.
2. Add the Milk:
Gradually pour the whole milk into the saucepan while whisking. Keep stirring until the mixture is smooth and free of lumps.
3. Heat the Mixture:
Place the saucepan over medium heat. Stir constantly until it’s hot and the sugar has completely dissolved—but be careful not to let it boil.
4. Melt the Chocolate:
Once the mixture is hot, remove it from the heat. Add the chocolate chips or chopped chocolate and stir until they are completely melted and the mixture is smooth.
5. Combine with Cream and Vanilla:
Pour the chocolate mixture into a large bowl. Add the heavy cream and vanilla extract. Stir well to combine everything.
6. Chill the Mixture:
Cover the bowl and place it in the refrigerator for at least 2 hours or until it is thoroughly chilled. This step is important for achieving that creamy texture!
7. Churn the Ice Cream:
Once the mixture is chilled, pour it into your ice cream maker. Churn it according to the manufacturer’s instructions, typically for about 20-25 minutes, until it thickens and has a soft-serve consistency.
8. Freeze for Firmness:
Transfer the ice cream to a freezer-safe container. Smooth the top and press a piece of plastic wrap or parchment paper on the surface (this helps prevent ice crystals). Freeze for an additional 4 hours or until it is firm.
9. Serve and Enjoy:
Now comes the best part—scooping it into bowls! Enjoy your homemade, creamy classic chocolate ice cream. You can serve it plain or top it with your favorite toppings, like whipped cream, chocolate sauce, or nuts!
This recipe yields a smooth, rich chocolate ice cream with just the right balance of sweetness and deep cocoa flavor. It’s creamy, scoopable, and absolutely delicious—just like you see in the image! 🍦 Enjoy every bite!
FAQ for Easy Classic Chocolate Ice Cream Recipe
Can I Use Low-Fat Milk Instead of Whole Milk?
Yes, you can use low-fat milk or even a non-dairy milk alternative like almond or oat milk. Just keep in mind that using lower-fat options may result in a slightly less creamy texture.
What Can I Use Instead of Heavy Cream?
If you prefer a lighter option, you can substitute half-and-half for heavy cream. However, for a rich taste, I recommend sticking with heavy cream or using coconut cream for a dairy-free version.
How Do I Store Leftover Ice Cream?
Store any leftover ice cream in an airtight container in the freezer. To keep it fresh and prevent ice crystals from forming, press a layer of plastic wrap directly onto the surface before sealing with the container lid. It will keep for up to 2 weeks.
Can I Add Mix-ins to the Ice Cream?
Absolutely! Feel free to stir in chocolate chunks, nuts, or even swirls of caramel or peanut butter after churning. Just add them in the last few minutes of churning for an even distribution!