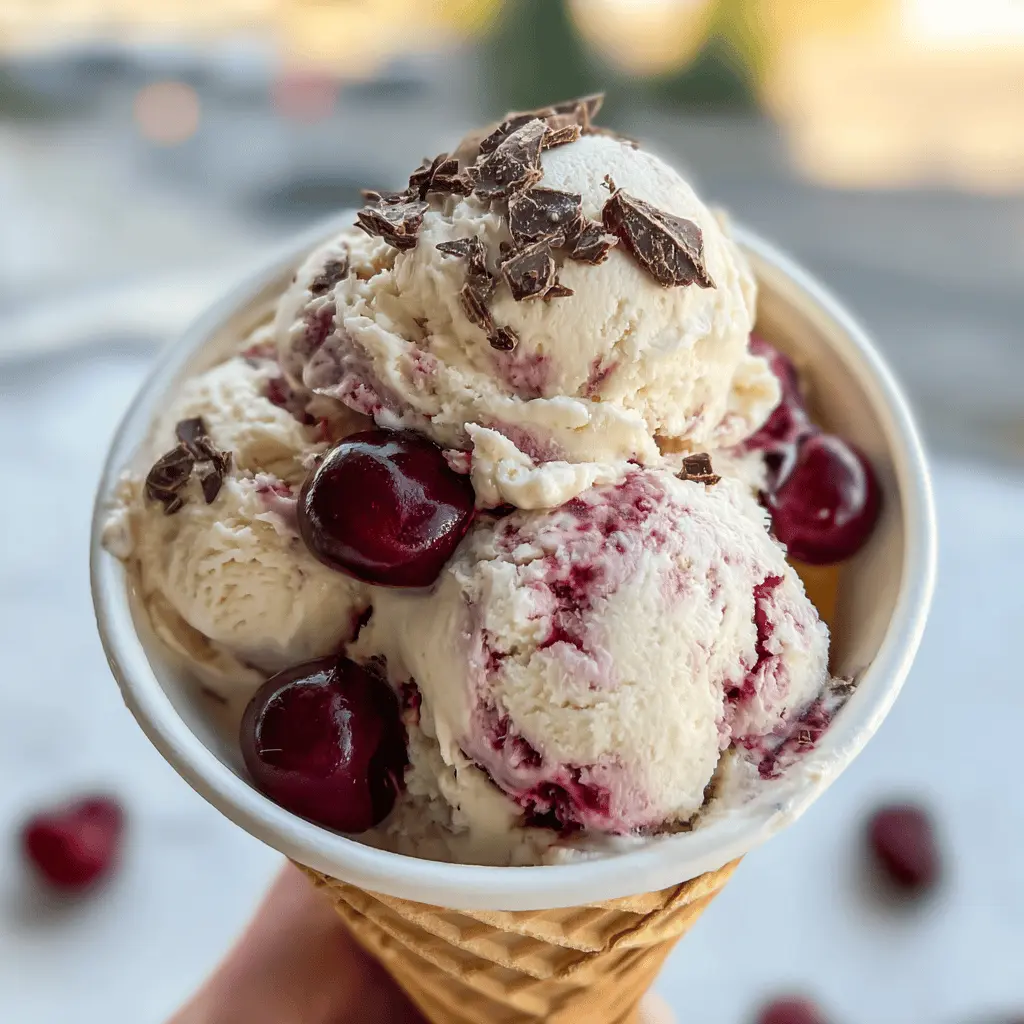
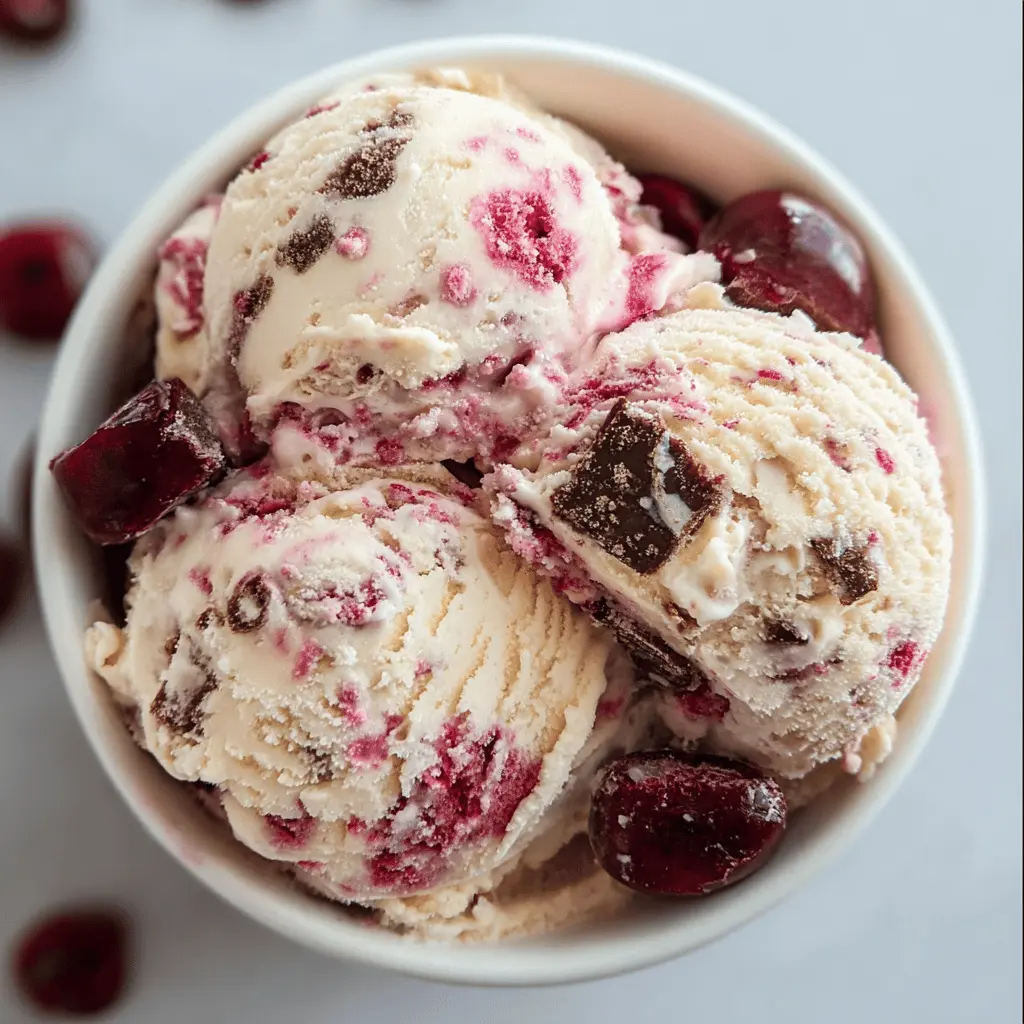
This Easy Homemade Cherry Garcia Ice Cream is a creamy treat packed with sweet cherries and chocolate chunks. It’s like a hug in a bowl on a hot day!
Making ice cream at home is super fun! I love how you can adjust the cherries and chocolate to your liking. Perfect for a sunny afternoon with friends or just for yourself! 🍒🍫
Key Ingredients & Substitutions
Heavy Cream: This is key for a rich, creamy texture. If you’re in a pinch, you can use half-and-half or a mixture of whole milk with a little melted butter for a slightly lighter version.
Cherries: Fresh cherries are great, but frozen ones can be a fantastic substitute. They’re often sweeter and can be ready to go anytime! Just be sure to drain excess juice if they’re frozen.
Dark Chocolate: I love dark chocolate for its rich flavor. If you prefer, milk chocolate or even white chocolate can work perfectly! Chopping a chocolate bar gives you larger chocolate chunks for a nice texture.
Lemon Juice: This brightens the cherry flavor. If you’re out, a splash of lime juice can work too, adding a fun twist!
How Do I Get the Best Texture When Making Ice Cream?
The texture of your ice cream is crucial, and the churning process plays a big role. Here’s how to achieve a creamy consistency:
- Chill your ice cream base thoroughly before churning; this helps it freeze faster.
- Be careful not to over-churn. Stop when it reaches soft-serve consistency to avoid a grainy texture.
- If you have it, adding a tablespoon of corn syrup can help prevent ice crystals and keep the ice cream creamy.
Once it’s done churning, freeze it in a container to harden properly. Waiting at least 4 hours makes a big difference!
Easy Homemade Cherry Garcia Ice Cream
Ingredients You’ll Need:
- 2 cups heavy cream
- 1 cup whole milk
- 3/4 cup granulated sugar
- 1 teaspoon vanilla extract
- 1 cup fresh or frozen pitted cherries (chopped)
- 1 tablespoon lemon juice
- 1/2 cup dark chocolate chunks or chopped dark chocolate
- Optional: 1 tablespoon corn syrup (to keep the ice cream smoother)
How Much Time Will You Need?
This recipe requires about 15 minutes of prep time and at least 4 hours to freeze. You’ll spend some time mixing up the rich ice cream base and preparing the cherries and chocolate before letting it firm up in the freezer. Totally worth the wait!
Step-by-Step Instructions:
1. Mix the Base:
In a medium bowl, whisk together the heavy cream, whole milk, sugar, and vanilla extract. Keep whisking until the sugar is completely dissolved. This creamy base is going to be the heart of your ice cream!
2. Prepare the Cherries:
If you’re using fresh cherries, chop them up and toss them with lemon juice to bring out their sweetness. If you have frozen cherries, just thaw them and drain any excess liquid before adding them to the mix.
3. Churn the Ice Cream:
Pour your ice cream base into your ice cream maker and churn it according to the manufacturer’s instructions until it reaches a soft-serve consistency. This usually takes about 20-25 minutes.
4. Mix in the Goodies:
When your ice cream is nearly done churning, add in the chopped cherries and chocolate chunks. Let the machine mix them for the last minute, ensuring they get evenly distributed throughout the ice cream.
5. Freeze Until Firm:
Transfer the ice cream mixture to a freezer-safe container. Cover it tightly and freeze for at least 4 hours, or until it’s fully firm. This is the hardest part—waiting for it to set!
6. Serve and Enjoy:
When you’re ready to enjoy your delicious Cherry Garcia ice cream, scoop it into bowls. Feel free to top it with extra cherry halves and chocolate chunks for a lovely presentation!
Dig in and enjoy the creamy, fruity, and chocolatey goodness of your homemade Cherry Garcia ice cream! 🍦🍒
FAQ About Easy Homemade Cherry Garcia Ice Cream
Can I Use Different Types of Fruit?
Absolutely! While cherries are classic, you can swap them for other fruits like blueberries, strawberries, or raspberries. Just remember to adjust the sweetness as needed, especially if using fruits that are less sweet than cherries.
What If I Don’t Have an Ice Cream Maker?
No problem! You can still make this ice cream without a machine. After mixing all the ingredients, pour the mixture into a shallow dish and freeze it. Stir every 30-60 minutes for about 3-4 hours to help incorporate air and prevent ice crystals from forming.
How Long Does the Ice Cream Last in the Freezer?
Your homemade Cherry Garcia ice cream will last about 2-3 weeks in the freezer. Make sure it’s in an airtight container to keep it fresh and prevent freezer burn.
Can I Make This Ice Cream Dairy-Free?
Yes! You can use coconut cream or almond milk in place of heavy cream and whole milk. Just check if the alternative milk has a creamy texture for the best results. You may also want to add a thickener like arrowroot powder for creaminess.