Cooler weather calls for warm, comforting treats, and nothing says cozy quite like a freshly baked loaf of pumpkin bread. I love baking with pumpkin this time of year because it brings such a lovely, moist texture and beautiful color to quick breads. Today, I’m sharing four wonderful pumpkin bread recipes that I think you will really enjoy making and eating!
Whether you like fruit, chocolate, or nuts in your baked goods, there’s a pumpkin bread here for you. Each one is simple to make and tastes amazing. Let’s get baking!
Jump to Recipe:
- 1. Pumpkin Apple Bread Recipe
- 2. Simple Pumpkin Chocolate Chip Bread
- 3. Homemade Pumpkin Pecan Bread
- 4. Easy Pumpkin Walnut Bread
Warm Pumpkin Apple Bread Recipe
This pumpkin apple bread is a wonderful blend of sweet pumpkin and tender apple pieces. It’s perfect for a breakfast treat or an afternoon snack with your coffee.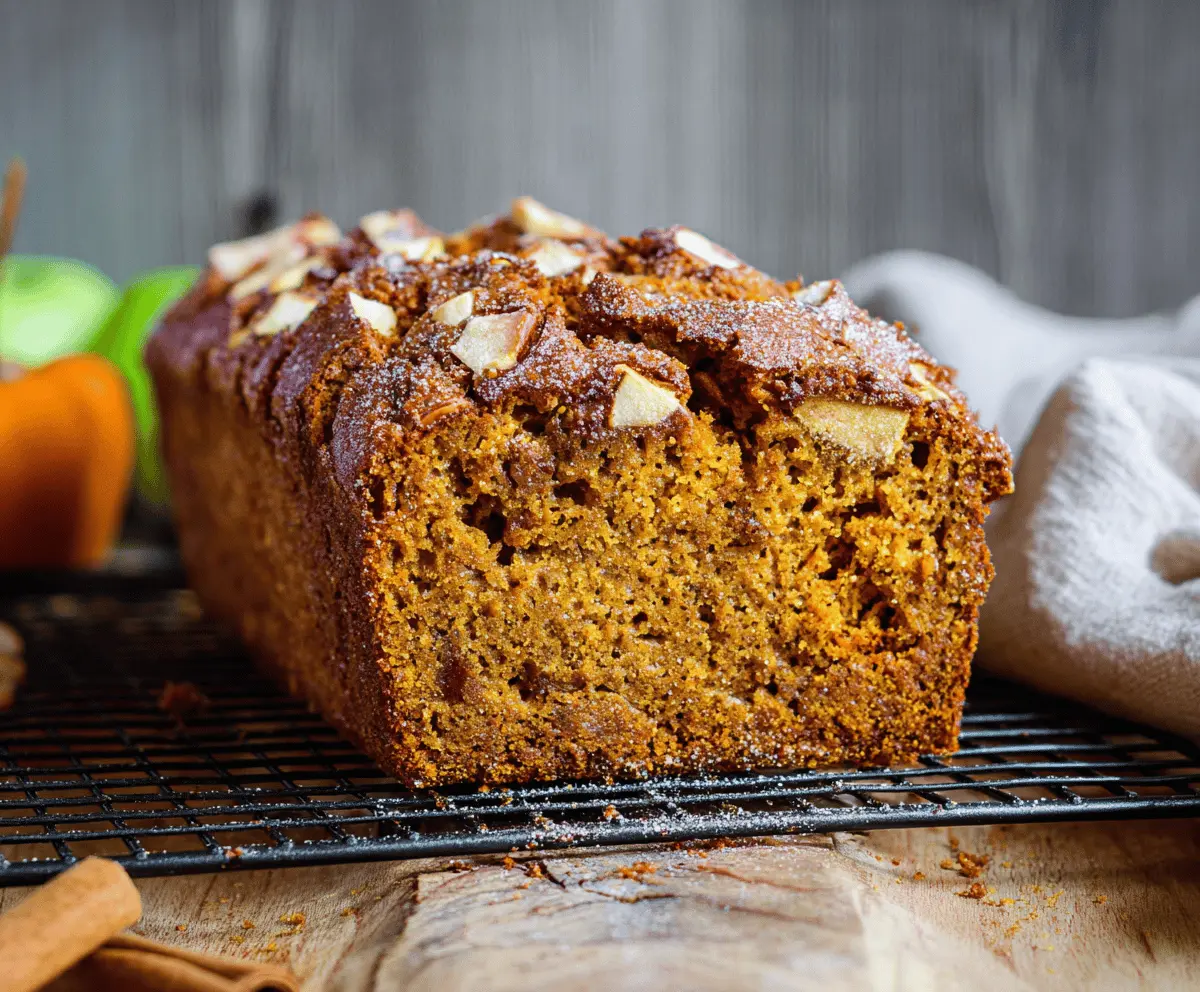
Key Ingredients & Baking Tips
- Fresh Apples: Use firm, crisp apples like Granny Smith or Honeycrisp for the best texture in your bread. Chop them into small, even pieces.
- Perfect Spices: A mix of cinnamon, nutmeg, and a little ginger makes the pumpkin flavor shine. You can add a pinch of allspice too if you like.
What You Need for Pumpkin Apple Bread
- 1 ½ cups all-purpose flour
- 1 cup pumpkin puree (not pie filling)
- ½ cup chopped apple (about 1 small apple)
- 2 large eggs
- ¾ cup granulated sugar
- ½ cup vegetable oil
- 1 tsp baking soda
- ½ tsp ground cinnamon
- ¼ tsp ground nutmeg
⏱️ Time: 1 hour 15 minutes🍽️ Yields: 1 loaf
How to Make Pumpkin Apple Bread
Step 1: Get Ready to Mix
Preheat your oven to 350°F (175°C) and grease a standard loaf pan. In a large bowl, whisk together the flour, baking soda, cinnamon, and nutmeg. Set this dry mixture aside.
Step 2: Combine Wet and Dry
In a separate medium bowl, whisk the pumpkin puree, eggs, granulated sugar, and vegetable oil until the mixture is smooth and well combined. Pour this wet mixture into the dry ingredients. Stir gently with a spoon or spatula until just combined. Be careful not to overmix. Fold in the chopped apples.
Step 3: Bake and Enjoy Your Loaf
Pour the batter evenly into your prepared loaf pan. Bake for 60-70 minutes, or until a wooden skewer inserted into the center comes out clean. Let the bread cool in the pan for 10 minutes before moving it to a wire rack to cool completely.
📝 Final Note
This pumpkin apple bread stays wonderfully moist for up to 3-4 days when stored in an airtight container at room temperature. You can also freeze slices for later!
Simple Pumpkin Chocolate Chip Bread
If you love the combination of pumpkin and chocolate, this bread is for you. It’s easy to make and the chocolate chips add a lovely sweetness and texture.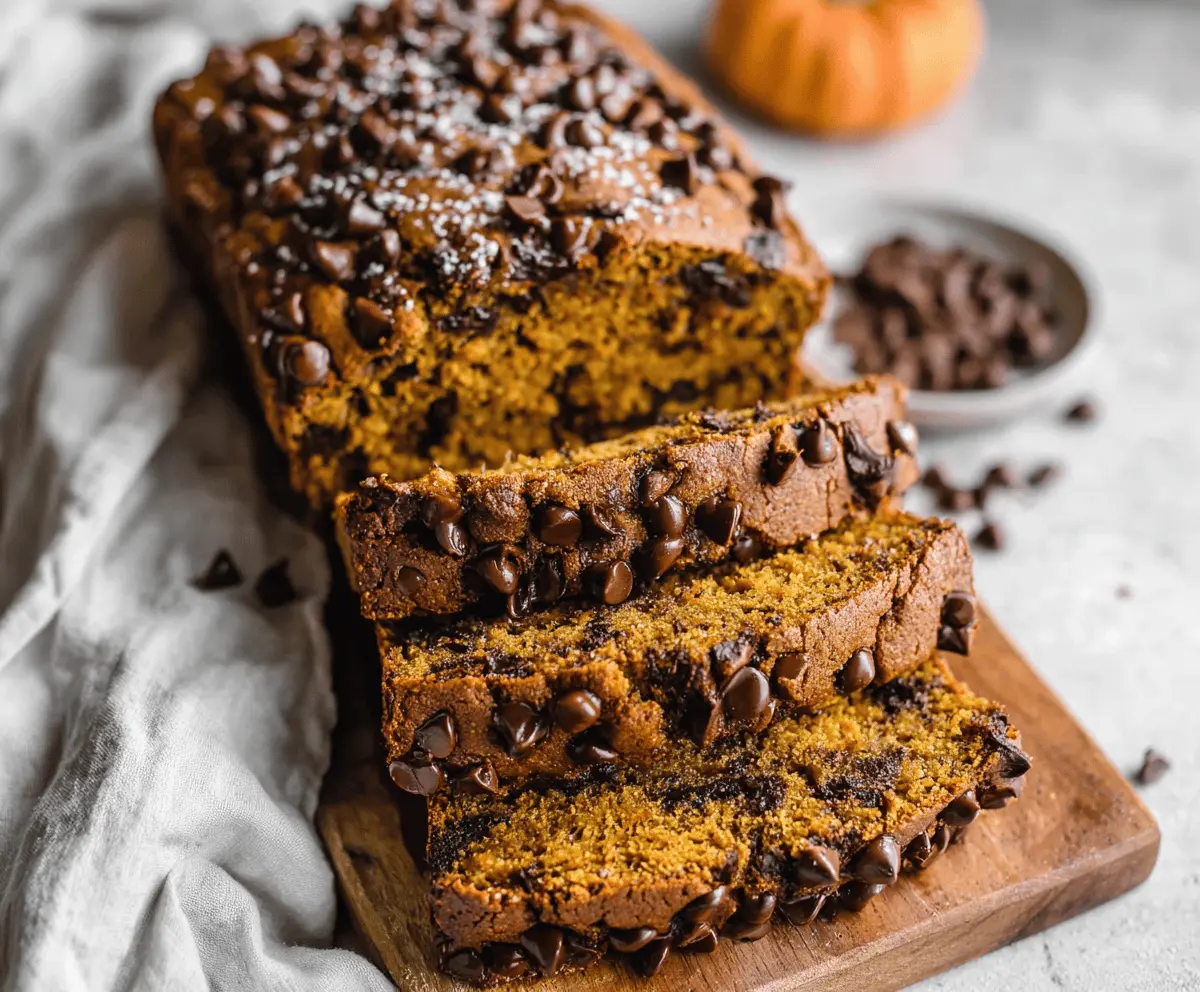
Key Ingredients & Baking Tips
- Chocolate Chip Choices: Use good quality semi-sweet chocolate chips. You can also try milk chocolate or dark chocolate chips based on what you like best.
- Prevent Sinking Chips: Lightly toss your chocolate chips with a tablespoon of flour before adding them to the batter. This helps them stay evenly spread in the bread.
What You Need for Pumpkin Chocolate Chip Bread
- 1 ½ cups all-purpose flour
- 1 cup pumpkin puree
- 1 cup semi-sweet chocolate chips
- 2 large eggs
- ¾ cup granulated sugar
- ½ cup vegetable oil
- 1 tsp baking soda
- ½ tsp ground cinnamon
- ¼ tsp ground cloves
⏱️ Time: 1 hour 10 minutes🍽️ Yields: 1 loaf
How to Make Pumpkin Chocolate Chip Bread
Step 1: Prep Your Dry Mix
Preheat your oven to 350°F (175°C) and grease a standard loaf pan. In a large bowl, whisk together the flour, baking soda, cinnamon, and cloves. Set aside.
Step 2: Combine Wet and Dry Gently
In another bowl, whisk the pumpkin puree, eggs, granulated sugar, and vegetable oil until smooth. Pour this wet mixture into the dry ingredients and stir gently until just combined. Fold in the chocolate chips carefully.
Step 3: Bake Until Golden
Pour the batter into your prepared loaf pan. Bake for 60-70 minutes, or until a wooden skewer inserted into the center comes out clean. Let cool in the pan for 10 minutes, then transfer to a wire rack to cool fully.
📝 Final Note
For an extra chocolatey flavor, sprinkle a few extra chocolate chips on top of the batter before baking. It looks nice too!
Homemade Pumpkin Pecan Bread
This pumpkin pecan bread offers a lovely crunch from the nuts that goes so well with the moist pumpkin flavor. It’s a comforting classic you’ll want to bake often.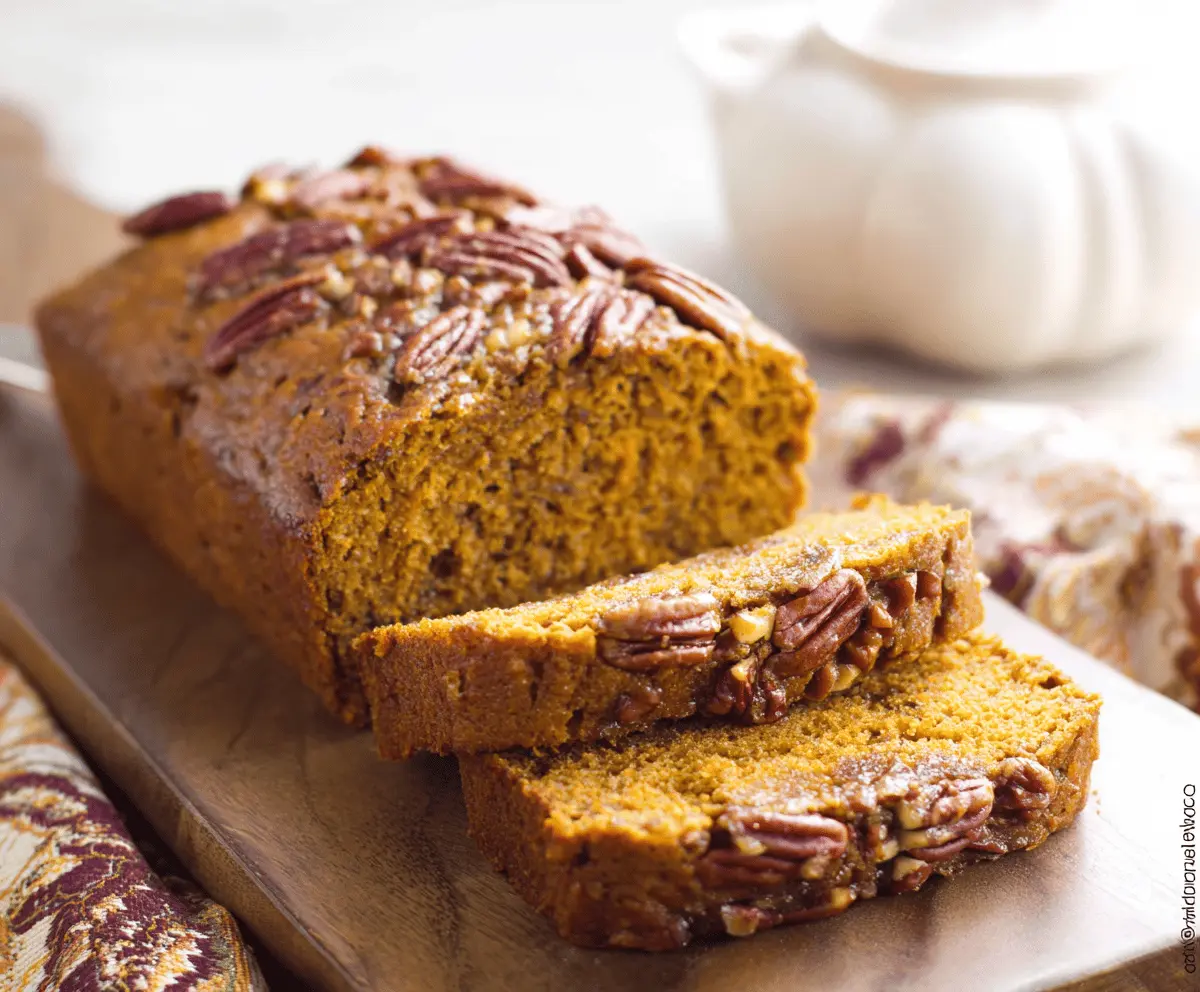
Key Ingredients & Baking Tips
- Toast Your Pecans: Lightly toasting the chopped pecans in a dry pan for a few minutes before adding them brings out their best flavor.
- Chop for Texture: Chop the pecans into smaller pieces for an even distribution and pleasant texture throughout the bread.
What You Need for Pumpkin Pecan Bread
- 1 ½ cups all-purpose flour
- 1 cup pumpkin puree
- ½ cup chopped pecans
- 2 large eggs
- ¾ cup granulated sugar
- ½ cup vegetable oil
- 1 tsp baking soda
- ½ tsp ground ginger
- ¼ tsp ground cloves
⏱️ Time: 1 hour 10 minutes🍽️ Yields: 1 loaf
How to Make Pumpkin Pecan Bread
Step 1: Prepare Your Dry Mix
Preheat your oven to 350°F (175°C) and grease a standard loaf pan. In a large bowl, whisk together the flour, baking soda, ginger, and cloves. Set this dry mix aside.
Step 2: Mix Wet with Dry
In a separate bowl, whisk the pumpkin puree, eggs, granulated sugar, and vegetable oil until smooth. Pour this wet mixture into the dry ingredients. Stir just until combined, being careful not to overmix. Fold in the chopped pecans.
Step 3: Bake and Cool
Pour the batter evenly into your prepared loaf pan. Bake for 60-70 minutes, or until a wooden skewer inserted into the center comes out clean. Let cool in the pan for 10 minutes before moving to a wire rack to cool completely.
📝 Final Note
For an even richer flavor, you can use brown sugar instead of granulated sugar in this recipe. It adds a nice depth!
Easy Pumpkin Walnut Bread
This pumpkin walnut bread is a classic for a reason. The earthy walnuts are a great match for the sweet pumpkin, making a comforting and hearty loaf.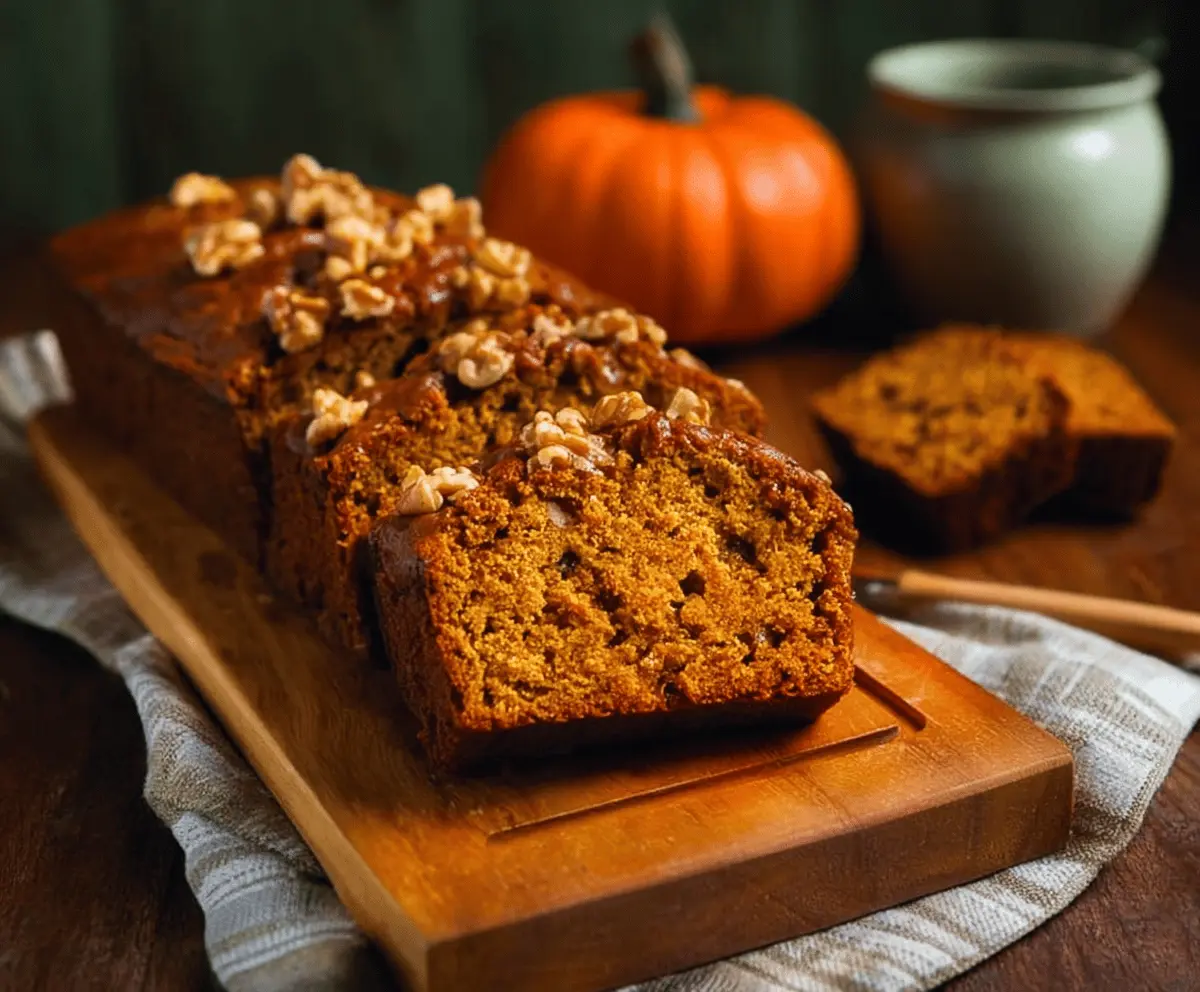
Key Ingredients & Baking Tips
- Fresh Walnuts: Make sure your walnuts are fresh; old walnuts can taste bitter. Give them a quick sniff before using.
- Rough Chop: A rough chop for your walnuts gives you nice pieces throughout the bread for good texture in every slice.
What You Need for Pumpkin Walnut Bread
- 1 ½ cups all-purpose flour
- 1 cup pumpkin puree
- ½ cup chopped walnuts
- 2 large eggs
- ¾ cup granulated sugar
- ½ cup vegetable oil
- 1 tsp baking soda
- ½ tsp ground allspice
- ¼ tsp ground nutmeg
⏱️ Time: 1 hour 15 minutes🍽️ Yields: 1 loaf
How to Make Pumpkin Walnut Bread
Step 1: Oven and Dry Ingredients Ready
Preheat your oven to 350°F (175°C) and grease a standard loaf pan. In a large bowl, whisk together the flour, baking soda, allspice, and nutmeg. Set the bowl aside.
Step 2: Combine Wet and Fold in Nuts
In a separate medium bowl, whisk the pumpkin puree, eggs, granulated sugar, and vegetable oil until smooth. Pour this wet mixture into the dry ingredients. Stir just until combined. Be sure not to overmix the batter. Gently fold in the chopped walnuts.
Step 3: Bake Until Perfectly Done
Pour the batter evenly into your prepared loaf pan. Bake for 60-70 minutes, or until a wooden skewer inserted into the center comes out clean. Let the bread cool in the pan for 10 minutes, then transfer to a wire rack to cool completely.
📝 Final Note
You can easily make this into muffins! Just divide the batter into a greased muffin tin and bake for about 20-25 minutes.