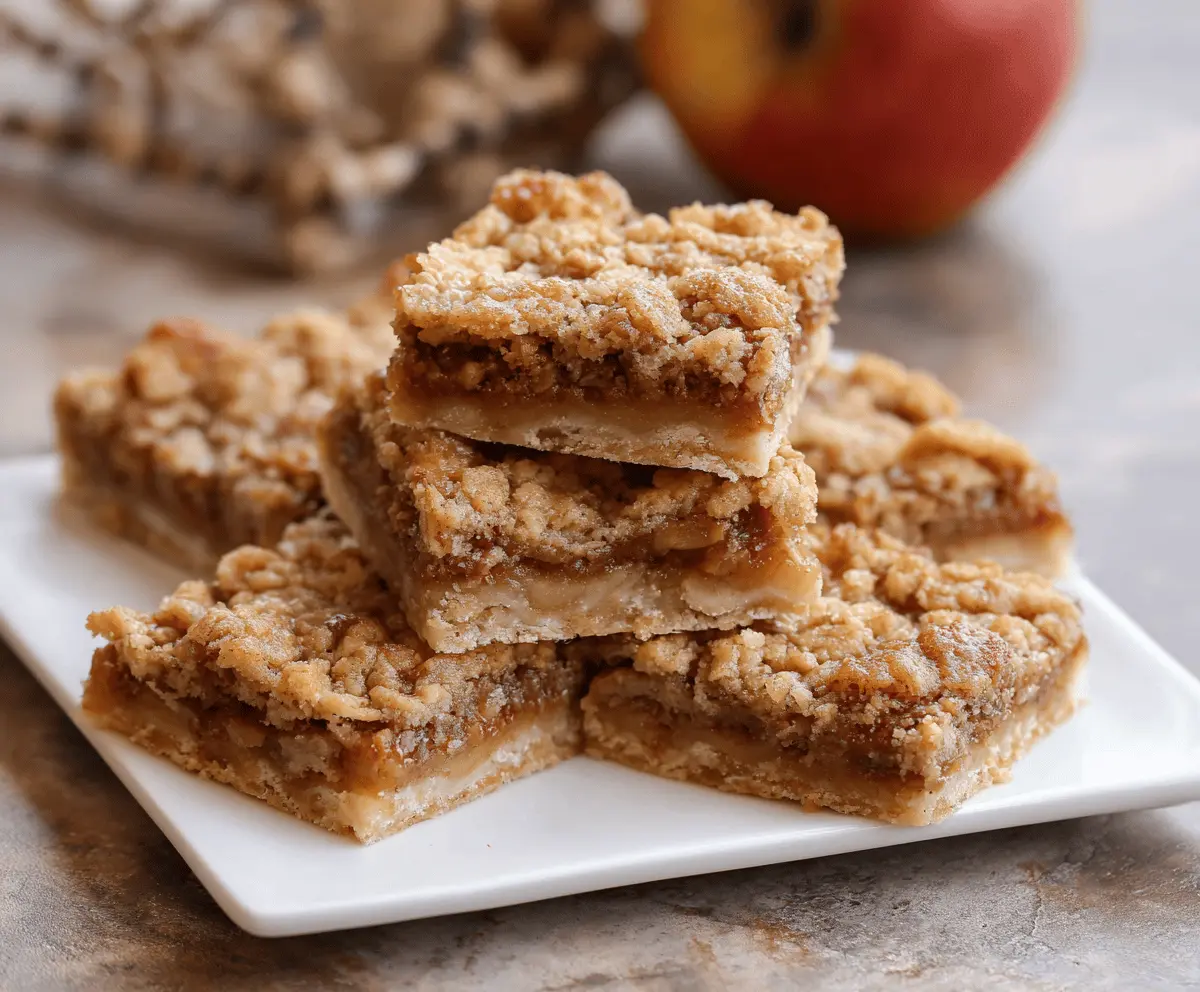
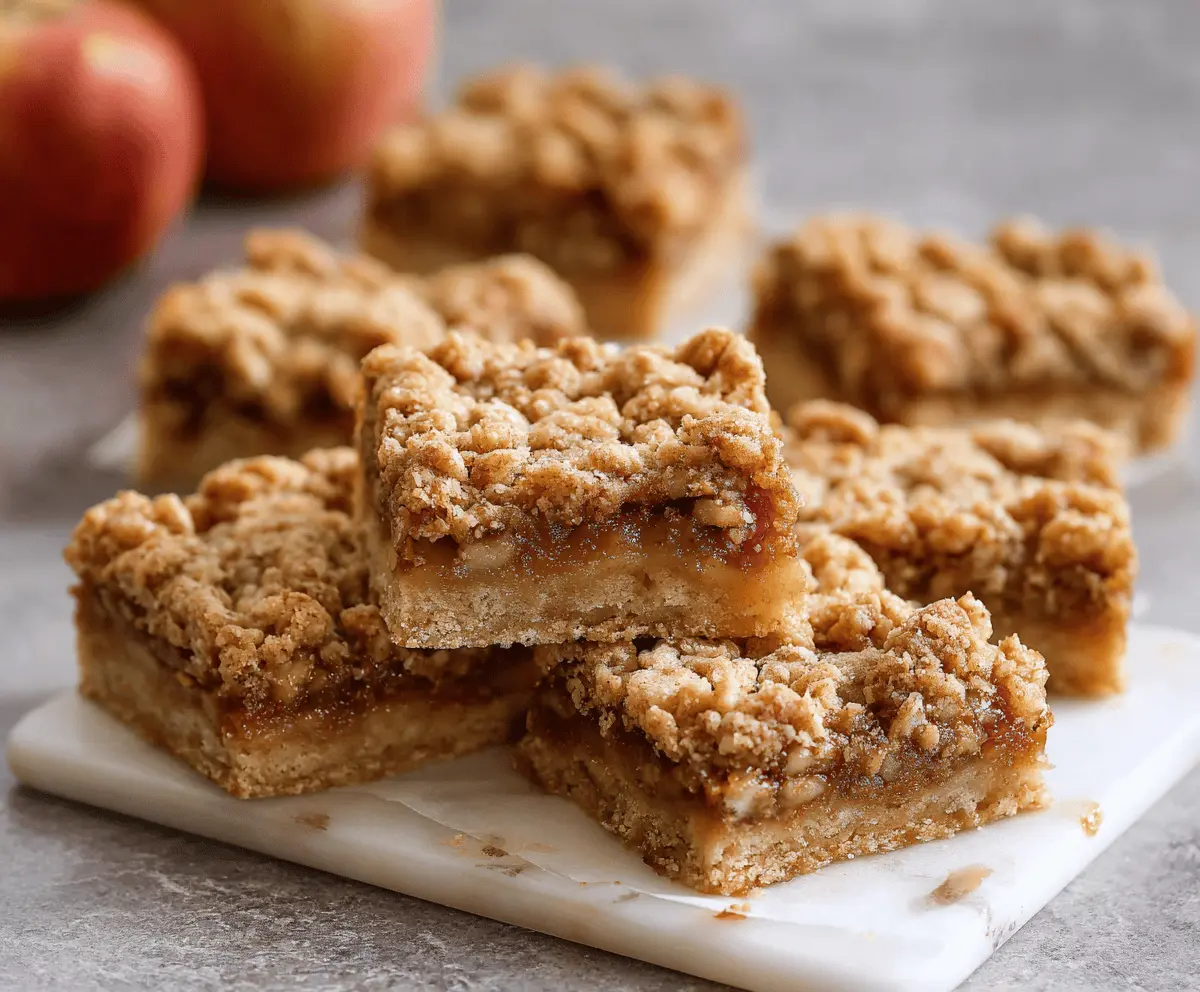
These Apple Crisp Bars are a sweet treat that everyone will love! With layers of tender apples, a buttery oat topping, and a hint of cinnamon, they are simply delicious.
Making them is a breeze! Just slice your apples, mix everything together, and bake. I often find myself having a little nibble before they cool. Who can resist warm apple goodness? 😊
Key Ingredients & Substitutions
All-purpose flour: This gives structure to your bars. You can substitute with whole wheat flour for a nuttier flavor or gluten-free blend if needed. Just ensure it’s a 1:1 blend for best results!
Old-fashioned rolled oats: These add a hearty texture to the crisp topping. Quick oats can work in a pinch, but they might make the topping a bit softer. I love the chewiness of rolled oats, though!
Apples: Granny Smith apples provide tartness, while Honeycrisp adds sweetness and crunch. Feel free to mix different varieties or even use pears for a twist!
Butter: Unsalted butter is ideal here, but if you’re in a pinch, you can use margarine or coconut oil. Just keep in mind that the flavor may slightly change.
Ground cinnamon: This adds warmth. If you’re a cinnamon fan, consider adding a bit more! You could also use apple pie spice for extra flavor.
How Do I Achieve the Perfect Crumb Texture for My Crisp Bars?
Creating the right crumb texture is essential for delicious Apple Crisp Bars. Start by mixing dry ingredients thoroughly before adding melted butter. This ensures even distribution.
- After combining wet and dry ingredients, aim for a crumbly mixture—that means not over-mixing!
- Press the base mixture firmly into the pan for stability.
- Keep some of the mixture aside for topping, ensuring it’s loose enough to crumble when sprinkled over the apples.
A little extra love in this step leads to a fantastic texture that’s both crunchy and chewy! Enjoy those bars fresh from the oven, or at room temperature for maximum flavor. 😊
How to Make Delicious Apple Crisp Bars
Ingredients You’ll Need:
For the Base and Topping:
- 1 cup all-purpose flour
- 1 cup old-fashioned rolled oats
- 1/2 cup light brown sugar, packed
- 1/2 teaspoon ground cinnamon
- 1/4 teaspoon ground nutmeg
- 1/4 teaspoon salt
- 1/2 cup unsalted butter, melted
For the Apple Filling:
- 3 medium apples (such as Granny Smith or Honeycrisp), peeled, cored, and finely chopped
- 1/4 cup granulated sugar
- 1 teaspoon lemon juice
- 1 teaspoon vanilla extract
- 1/2 teaspoon ground cinnamon (additional for filling)
How Much Time Will You Need?
This recipe takes about 15 minutes for prep and 45-50 minutes for baking. Plus, you’ll want to let the bars cool completely before cutting, so plan a total of about 1.5 hours from start to finish. It’s worth the wait for that delicious taste!
Step-by-Step Instructions:
1. Preheat Your Oven:
Begin by preheating your oven to 350°F (175°C). While it heats up, line a 9×9 inch square baking pan with parchment paper or lightly grease it. This will make it easier to lift out the bars later.
2. Make the Crust and Topping:
In a large bowl, mix the flour, rolled oats, brown sugar, cinnamon, nutmeg, and salt. This blend will form both the base and topping for your bars. Next, pour in the melted butter and stir everything together until the mixture is crumbly and clumps together a bit. Reserve about 1 1/2 cups of this mixture for the topping and set it aside.
3. Create the Base:
Press the remaining crumb mixture firmly and evenly into the bottom of the prepared baking pan. This will be your delicious crust!
4. Prepare the Apple Filling:
In another bowl, toss the chopped apples with granulated sugar, lemon juice, vanilla extract, and the additional cinnamon. Make sure the apples are well coated, as this will enhance their flavor!
5. Assemble the Bars:
Spread the apple mixture evenly over the pressed crust. Then, sprinkle the reserved crumb topping evenly on top of the apples. This creates that yummy crisp topping we love!
6. Bake:
Place the pan in the oven and bake for 45-50 minutes. You’ll know it’s ready when the top is golden brown and the apples are bubbling. The wonderful aroma will fill your kitchen!
7. Cooling and Serving:
Remove the pan from the oven and allow the bars to cool completely in the pan on a wire rack. This step is important as it helps the bars set up nicely. Once cooled, cut them into squares. Serve them warm or at room temperature, and don’t forget a scoop of vanilla ice cream or a drizzle of caramel sauce if you want to make it extra special!
Enjoy your homemade Apple Crisp Bars! They’re sure to be a hit! 🍏✨
Can I Use Different Types of Apples?
Absolutely! While Granny Smith and Honeycrisp are great choices, feel free to mix different varieties for a medley of flavors. Fuji, Gala, or even pears work well too!
How Should I Store Leftover Apple Crisp Bars?
Store any leftovers in an airtight container at room temperature for up to 3 days. If you’d like them to last longer, refrigerate for up to a week. Just be sure to let them cool completely before storing!
Can I Make These Bars Ahead of Time?
Yes! You can prepare the bars a day ahead. Just bake, cool, and store them covered at room temperature. They taste just as delicious the next day!
What Can I Use Instead of Butter?
For a dairy-free option, you can substitute unsalted butter with melted coconut oil or a dairy-free margarine. The flavor may change slightly, but it will still be tasty!