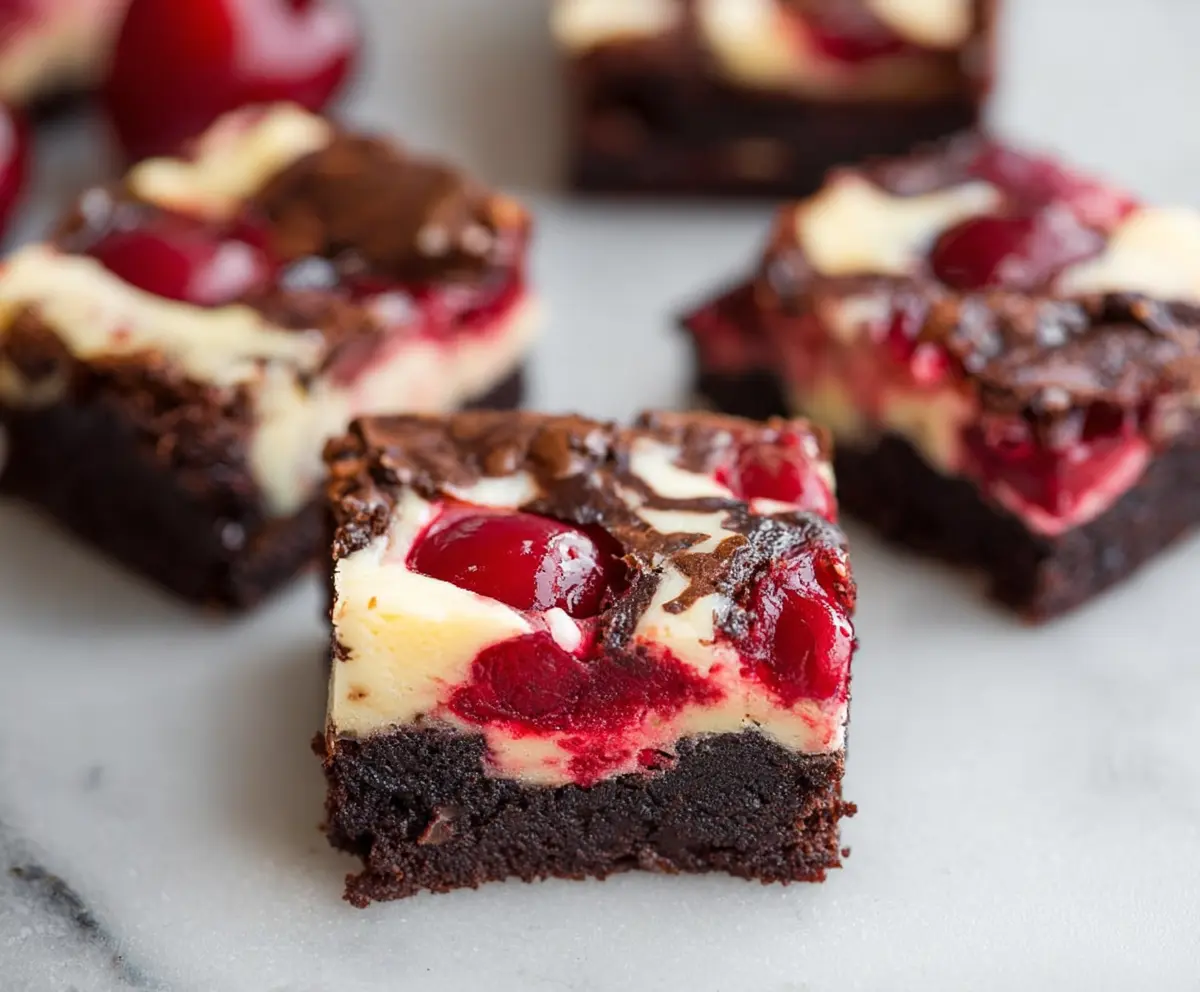
These cherry cheesecake brownies are a delicious mix of rich chocolate and creamy cheesecake, all topped with sweet cherries. They’re like a party in every bite!
Honestly, who can resist a dessert that combines brownie goodness with cheesecake flair? I love serving these at parties—everyone thinks I’m a baking superstar. 😉
Making these is a breeze! All you do is layer the brownie and cheesecake mixes, throw on those cherries, and bake. Easy-peasy and super tasty!
Key Ingredients & Substitutions
Unsalted Butter: I like using unsalted butter for better control over salt levels. If you’re in a pinch, you can use margarine, but the flavor won’t be as rich.
Granulated Sugar: Apart from granulated sugar, you can use brown sugar for a slight caramel flavor. Just remember that it might make the brownies a bit fudgier.
Cocoa Powder: Unsweetened cocoa powder is essential for that deep chocolate taste. If you’re out, you could use Dutch-processed cocoa for a smoother flavor.
Cream Cheese: For a lighter version, try using low-fat cream cheese. You could also substitute mascarpone cheese for a decadently creamy texture.
Cherries: Maraschino cherries are sweet and colorful, but fresh or frozen dark cherries work just as well. You might want to adjust the sugar if using fresh cherries, as they’re less sweet.
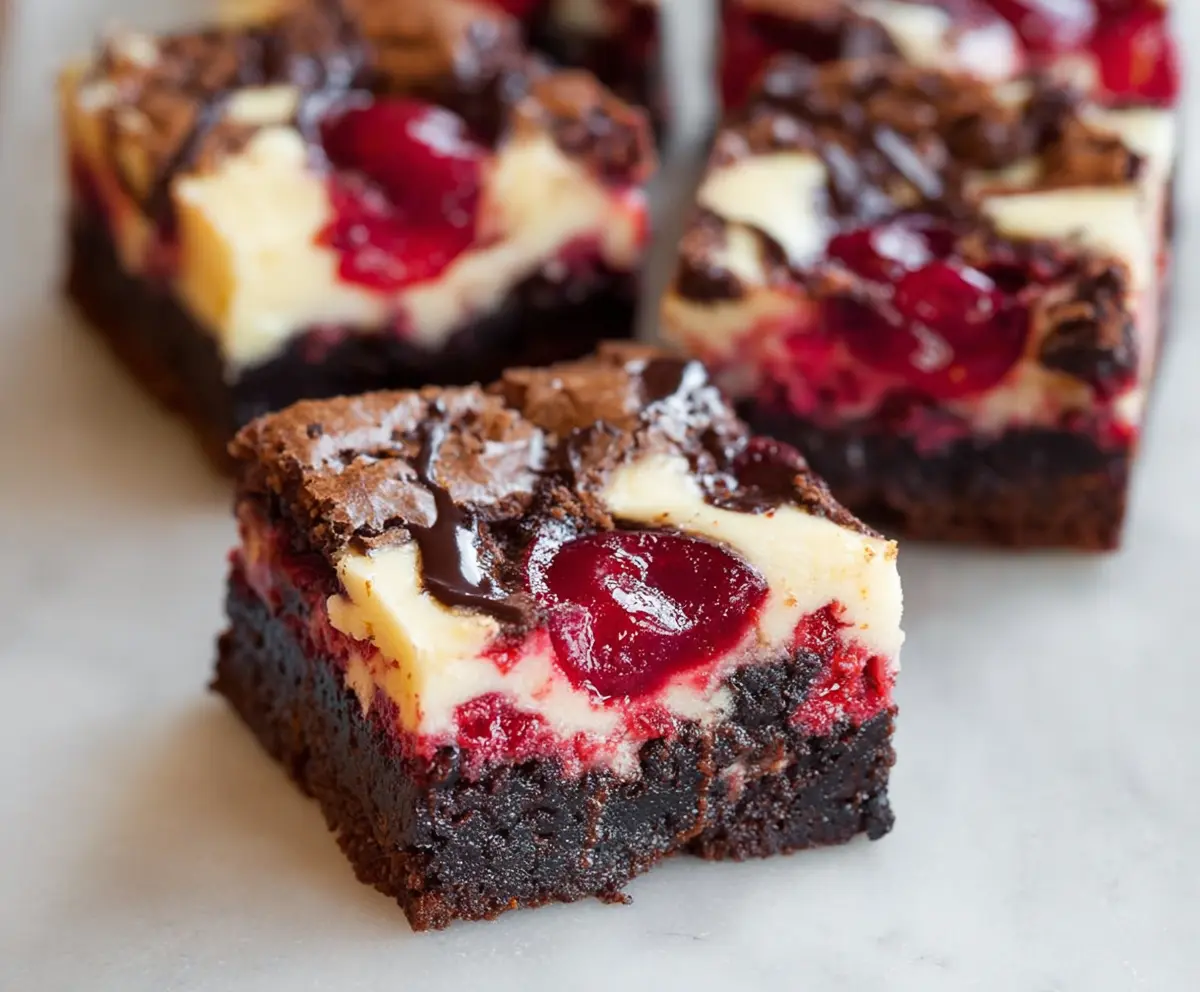
How Do I Get the Perfect Marble Effect?
Creating a beautiful marbled effect can be tricky but fun! Here’s how to get it just right:
- After dolloping the cheesecake mixture on top of the brownie layer, grab a butter knife or skewer.
- Gently swirl the knife through both layers without fully mixing them together.
- Think of it like a figure-eight motion, lifting the knife slightly as you go. This helps preserve layers!
- Don’t overdo it! A few swirls are perfect for that stunning marbled look.
Trust me, it’s worth the effort for those gorgeous brownies!
Cherry Cheesecake Brownies
Ingredients You’ll Need:
For the Brownie Layer:
- 1 cup (2 sticks) unsalted butter, melted
- 2 cups granulated sugar
- 4 large eggs
- 1 tsp vanilla extract
- 1 cup all-purpose flour
- 1 cup unsweetened cocoa powder
- 1/2 tsp salt
- 1/2 tsp baking powder
- 1 cup semisweet chocolate chips (optional)
For the Cheesecake Layer:
- 8 oz cream cheese, softened
- 1/2 cup granulated sugar
- 1 large egg
- 1 tsp vanilla extract
Cherry Topping:
- 1 cup pitted maraschino cherries or fresh/frozen dark sweet cherries, halved and drained if canned
How Much Time Will You Need?
This delicious dessert will take about 15 minutes to prepare and approximately 45-50 minutes to bake. Be sure to let the brownies cool completely, then refrigerate for at least 2 hours before slicing. It’s worth the wait for that perfect taste!
Step-by-Step Instructions:
1. Preheat the Oven:
Start by preheating your oven to 325°F (165°C). Don’t forget to grease or line a 9×13-inch baking pan with parchment paper to make transferring the brownies easier later on.
2. Make the Brownie Batter:
In a large mixing bowl, combine the melted butter and granulated sugar until thoroughly mixed. Add the eggs one at a time, making sure to mix well after each addition. Stir in 1 teaspoon of vanilla extract to add that wonderful flavor.
3. Combine Dry Ingredients:
In another bowl, whisk together the flour, cocoa powder, salt, and baking powder. Gradually add this dry mixture to the wet brownie mixture, folding it gently until just combined. If you’re feeling generous, fold in some chocolate chips for extra goodness!
4. Layer the Brownie Batter:
Spread the brownie batter evenly into your prepared baking pan. Make sure it’s as even as possible so that it bakes uniformly.
5. Prepare the Cheesecake Layer:
In a clean bowl, beat the softened cream cheese with the granulated sugar, egg, and 1 teaspoon of vanilla until the mixture is smooth and creamy. This will be the lovely creamy layer that pairs perfectly with your fudgy brownies.
6. Dollop and Swirl:
Now, gently dollop the cheesecake mixture over the brownie batter. Take a knife or skewer and use it to swirl the cheesecake into the brownie batter—this creates the beautiful marbled effect. Be gentle so that you don’t completely mix them together!
7. Add the Cherry Topping:
Evenly distribute the halved cherries over the top of the batter, gently pressing them in slightly so they blend into the swirled cheesecake.
8. Bake:
Pop the pan into the oven and bake for about 45-50 minutes. Keep an eye on them; you’ll know they’re ready when the cheesecake layer is set and a toothpick inserted near the center comes out with just a few moist crumbs!
9. Cool and Refrigerate:
Once baked, remove the brownies from the oven and let them cool completely in the pan on a wire rack. After they cool down, refrigerate them for at least 2 hours before cutting into squares.
10. Serve and Enjoy:
Slice the brownies into squares and serve them chilled or at room temperature. Enjoy the rich, fudgy chocolate combined with creamy cheesecake and tart cherries—it’s a delightful treat for any occasion!
Can I Use Different Types of Cherries?
Absolutely! While maraschino cherries add sweetness and a fun pop of color, you can also use fresh or frozen dark sweet cherries for a more natural flavor. Just remember to adjust the sugar if you use fresh cherries, as they tend to be less sweet.
Can I Make These Brownies Gluten-Free?
Yes, you can! Simply substitute all-purpose flour with a gluten-free flour blend that’s designed for baking. Just check the ingredients to ensure it’s suitable for your needs!
How Should I Store Leftovers?
Store any leftovers in an airtight container in the fridge for up to 5 days. For even longer shelf life, you can freeze the brownies. Make sure to wrap them tightly in plastic wrap before placing them in a freezer-safe container.
Can I Prepare the Cheesecake Layer in Advance?
Definitely! You can mix the cheesecake ingredients ahead of time and keep the mixture covered in the fridge for a day or two. Just give it a good stir before using it in the recipe for the best texture.