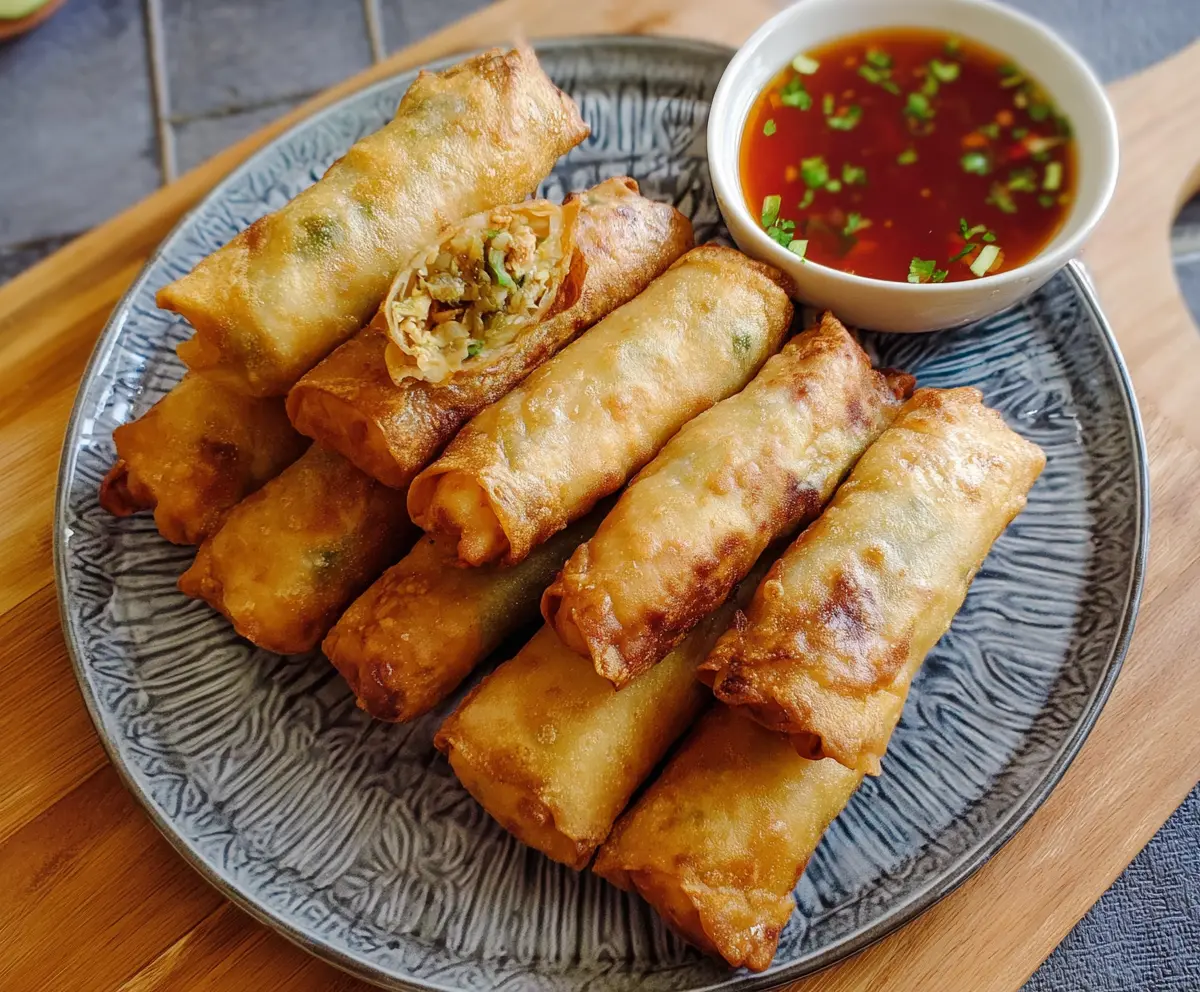
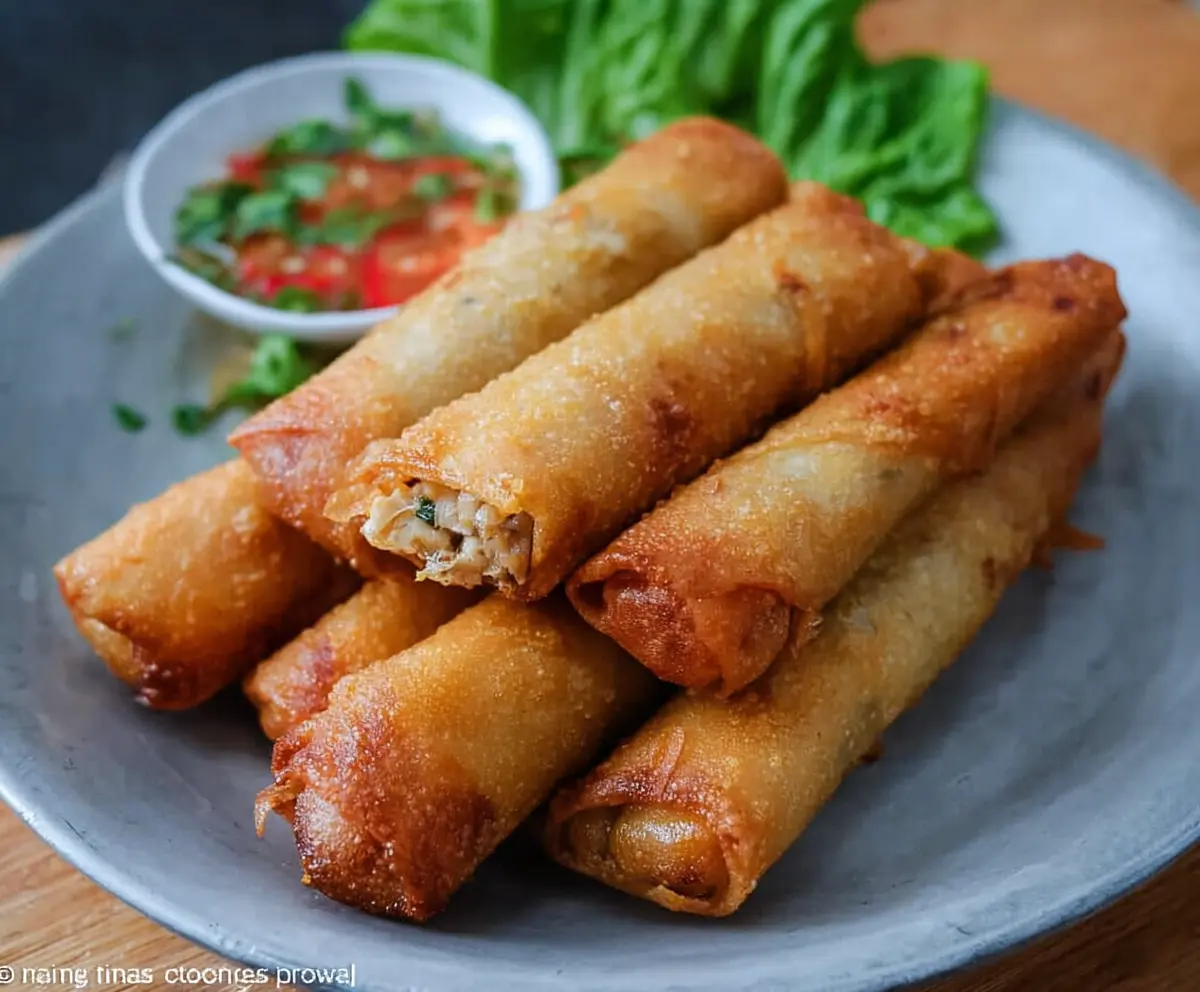
Chicken Lumpia is a crispy, golden Filipino spring roll filled with tasty chicken and veggies. It’s a great snack or appetizer that everyone loves!
Making Lumpia is like wrapping little gifts of flavor. I always serve them with a sweet dipping sauce, and they’re gone in a flash—trust me, you’ll want seconds! 😄
Key Ingredients & Substitutions
Ground Chicken: This is the main protein for your lumpia. If you prefer a leaner option, you could use ground turkey. For a vegetarian version, consider using finely chopped mushrooms or tofu as a substitute.
Cabbage: Cabbage gives a nice crunch. Green cabbage is great, but feel free to use Napa cabbage or even shredded kale if that’s what you have on hand. Some people like adding spinach for added nutrients too!
Carrots: They add color and sweetness. If you want a shortcut, pre-shredded carrots from the store work well. You could also use zucchini, just make sure to squeeze out excess moisture before adding to the filling.
Lumpia Wrappers: These are key for wrapping your filling. If you can’t find lumpia wrappers, egg roll wrappers can work in a pinch, although they might be a bit thicker. You can also try making your own if you’re feeling adventurous!
How Do I Get My Lumpia to Fry Crispy and Perfect?
The frying technique is crucial for getting deliciously crispy lumpia. Start by heating the oil to the right temperature, which is around 350°F (175°C). A hot oil helps achieve that golden-brown crunch!
- Use a thermometer to check oil temperature. If you don’t have one, drop a small piece of wrapper into the oil; if it sizzles right away, it’s ready.
- Fry in batches! Avoid overcrowding the pan, as this can cool the oil and make lumpia greasy.
- Keep an eye on the lumpia while frying. Turn them occasionally for even cooking.
- Once done, let them rest on paper towels to catch excess oil, helping maintain that crispy texture.
How to Make Delicious Chicken Lumpia!
Ingredients You’ll Need:
For the Filling:
- 1 lb ground chicken
- 2 cups cabbage, finely shredded
- 1 cup carrots, finely shredded
- 1/2 cup onion, finely chopped
- 3 cloves garlic, minced
- 1/4 cup green onions, chopped
- 1/4 cup water chestnuts, finely chopped (optional)
- 2 tbsp soy sauce
- 1 tbsp oyster sauce
- 1 tsp ground black pepper
- 1 tsp salt
- 1 tbsp cooking oil (for the filling)
- Lumpia wrappers (spring roll wrappers), about 20 pieces
- Cooking oil for frying (vegetable or canola oil)
For the Dipping Sauce:
- 1/2 cup vinegar
- 2 tbsp soy sauce
- 1 tbsp brown sugar
- 1 clove garlic, minced
- 1 small chili pepper, chopped (optional)
- 1 tbsp water
- 1 tsp cornstarch mixed with 1 tbsp water (to thicken, optional)
- Chopped green onions or cilantro for garnish
How Much Time Will You Need?
This delicious Chicken Lumpia recipe will take about 30 minutes to prepare and an additional 20 minutes to cook. In total, you can have your tasty dish ready in about 50 minutes! Perfect for a quick dinner or a fun appetizer!
Step-by-Step Instructions:
1. Cook the Filling:
Start by heating 1 tablespoon of cooking oil in a pan over medium heat. Add the minced garlic and chopped onions, sautéing until they are fragrant and translucent. Next, add the ground chicken and cook until it’s no longer pink—make sure to break it apart as it cooks for an even texture.
2. Add the Veggies:
Once the chicken is cooked, stir in the finely shredded cabbage, carrots, green onions, and optional water chestnuts. Cook everything together for about 3-5 minutes, just until the vegetables are slightly softened.
3. Flavor It Up:
Now, add the soy sauce, oyster sauce, salt, and pepper to the mixture. Stir everything together and let it cook for another 2 minutes. After that, take the filling off the heat and let it cool a bit.
4. Wrap It Up:
Lay a lumpia wrapper flat on a clean surface with one corner pointing towards you (like a diamond shape). Take about 2 tablespoons of the filling and place it near the corner closest to you, shaping it into a small log. Fold the corner over the filling, then fold in the sides, and roll it tightly towards the opposite corner. Use a little water or beaten egg to seal the end. Repeat this until you’ve used all the filling!
5. Fry the Lumpia:
In a deep pan or fryer, heat oil to 350°F (175°C). Carefully add the lumpia in batches, frying them until they are golden brown and crispy, which should take about 3-4 minutes. Once they’re done, let them drain on paper towels to remove excess oil.
6. Make the Dipping Sauce:
For the delicious dipping sauce, combine vinegar, soy sauce, brown sugar, minced garlic, optional chili pepper, and water in a small saucepan. Bring it to a gentle simmer over medium heat. If you want a thicker sauce, stir in the cornstarch-water mixture and remove from heat once it thickens. Garnish with chopped green onions or cilantro for that extra touch!
7. Serve and Enjoy:
Now, serve your crispy Chicken Lumpia hot with the dipping sauce on the side. Enjoy this savory and crunchy delight with family or friends!
Happy cooking!
Can I Use Frozen Chicken for This Recipe?
Yes, you can use frozen chicken! Just make sure to thaw it completely before cooking. The best way to thaw is overnight in the refrigerator or by placing the sealed chicken in cold water for a quicker method.
What Can I Substitute for Water Chestnuts?
If you don’t have water chestnuts on hand, you can omit them or use finely chopped nuts like cashews or even diced bell peppers for added crunch. Just keep in mind that the flavor will differ slightly!
How to Store Leftover Lumpia?
To store leftovers, place the lumpia in an airtight container and refrigerate them for up to 3 days. For the best texture, reheat them in the oven at 350°F (175°C) for about 10 minutes to restore crispiness rather than using the microwave.
Can I Make the Filling Ahead of Time?
Absolutely! You can prepare the filling a day in advance. Just make sure to let it cool completely, then store it in an airtight container in the refrigerator. When you’re ready to wrap and fry, it will be all set to go!