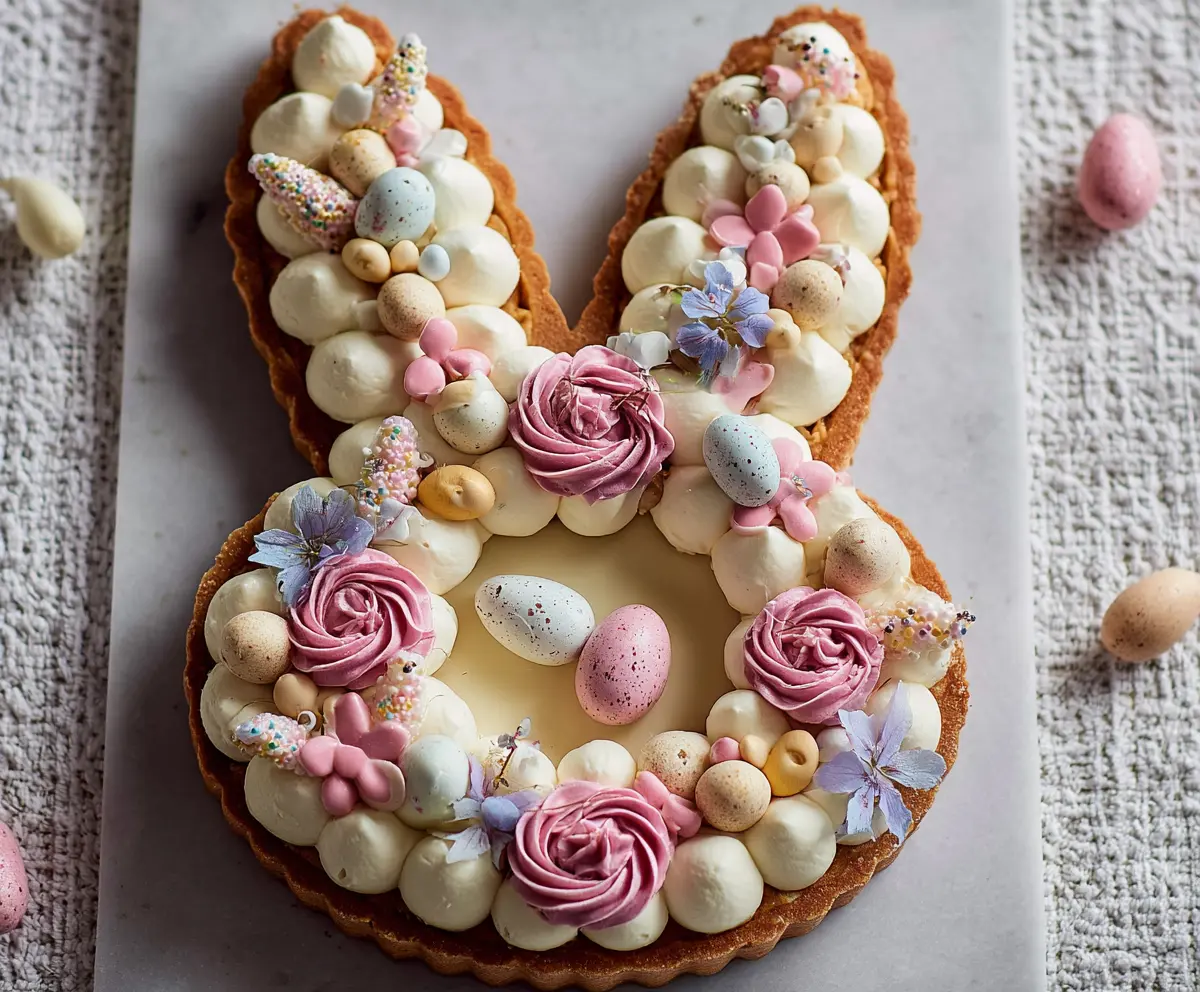
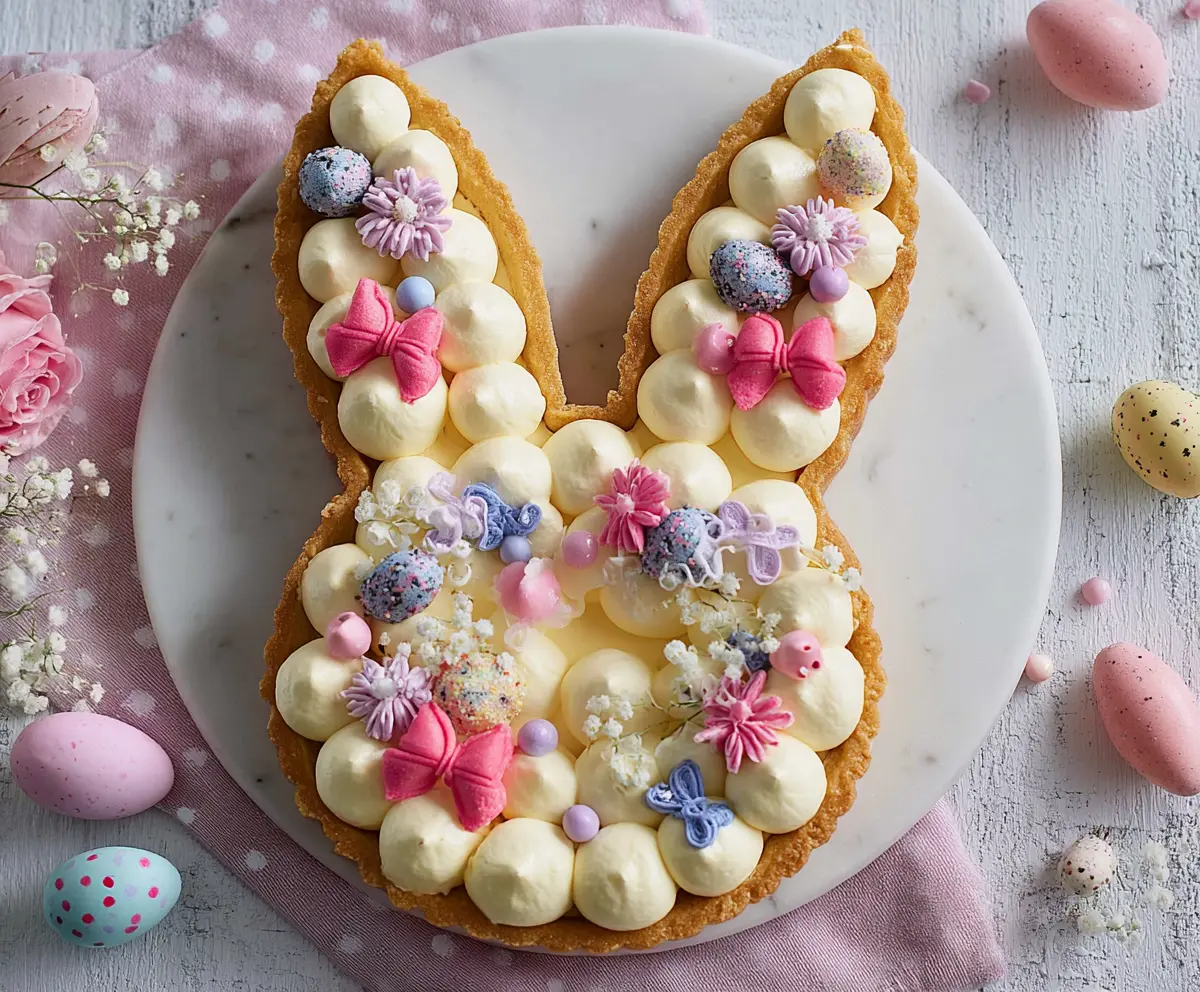
This Easter Bunny Cream Tart is simply adorable! With a fluffy cream filling and a cookie crust, it’s the perfect treat for celebrating springtime. Plus, it looks delightful on any table!
Let’s face it, a dessert shaped like a bunny instantly makes everything more fun, right? I love to make it with my kids, and we get giggles as we decorate it with colorful candies!
Making this tart is super easy. Just whip up the cream, press the crust, and let it chill. It’s a sweet way to share some joy during the holiday season!
Key Ingredients & Substitutions
All-purpose flour: This forms the base of your tart shell. If you need a gluten-free option, try a gluten-free flour blend. I’ve found that they work pretty well in tart recipes.
Cream cheese: A key ingredient for that creamy filling. If you’re looking for a lighter version, use Greek yogurt instead, but note that it will change the flavor slightly.
Heavy cream: This gives the filling its smooth texture. If you’re seeking a dairy-free alternative, you can use coconut cream. It will add a nice sweetness too.
Powdered sugar: Essential for sweetness and texture in the filling. If you want to reduce sugar, try stevia or other sugar substitutes, though it may alter the final texture a bit.
Decorations: Feel free to mix up the candy decorations based on your preference! Use cute edible flowers, like pansies or nasturtiums, for a fresh look. Chocolate decorations can add a richer flavor.
How Do I Make the Tart Shell Perfect Every Time?
Making a tart shell requires some patience, but it’s worth it! Follow these steps for a perfect crust:
- Keep your butter cold. This helps create a flaky texture. You can even chill your bowl and tools before starting.
- Use your fingertips or a pastry cutter to mix the cold butter with flour. Don’t overwork it; you want it to look like coarse crumbs.
- Chill the dough properly after mixing. Cooling it for at least 30 minutes makes it easier to roll out and helps prevent shrinking when baked.
- When rolling out, keep dusting with flour to prevent sticking. Aim for an even thickness of about 3mm.
- When baking, keep an eye on the color; it should be golden brown but not too dark. If the edges start browning too quickly, cover them with foil.
How to Make Easter Bunny Cream Tart
Ingredients You’ll Need:
For the Tart Shell:
- 200g all-purpose flour
- 100g cold unsalted butter, cubed
- 70g powdered sugar
- 1 egg yolk
- 2 tbsp cold water
- 1/4 tsp salt
For the Cream Filling:
- 250ml heavy cream
- 150g cream cheese, softened
- 100g powdered sugar
- 1 tsp vanilla extract
For Decoration:
- Pink buttercream or whipped cream (colored with food coloring for roses)
- Various pastel-colored mini candy eggs (chocolate or sugar-coated)
- White chocolate bunny ears covered with colorful sprinkles
- Small pastel-colored candy pieces (flowers, butterflies, etc.)
- Edible flowers (e.g., violets or similar lavender-colored flowers)
- Optional: edible gold leaf or glitter for extra decoration
How Much Time Will You Need?
This delicious dessert takes about 30 minutes to prepare, plus around 20-30 minutes to bake and an additional hour to chill before serving. So, set aside about 2 hours in total. It’s easy, fun, and perfect for spring celebrations!
Step-by-Step Instructions:
1. Make the Tart Shell:
First, grab a mixing bowl and combine the flour, powdered sugar, and salt. Then, add the cubed cold butter. Use your fingertips or a pastry cutter to mix it all together until it looks like coarse crumbs. Next, add the egg yolk and cold water, mixing gently just until the dough starts to come together. Form it into a disc, wrap it in plastic wrap, and pop it in the refrigerator for at least 30 minutes.
2. Bake the Tart Shell:
Once your dough is chilled, preheat your oven to 180°C (350°F). Roll out the dough on a lightly floured surface to about 3mm thick. Using a large bunny-shaped cookie cutter or template, cut out the shape. Carefully transfer your dough to a tart pan or baking sheet and bake for 15-20 minutes, or until it turns golden brown. Let it cool completely on a wire rack.
3. Prepare the Cream Filling:
While the tart shell cools, let’s whip up the filling! In a mixing bowl, beat the softened cream cheese until it’s nice and smooth. Gradually add the powdered sugar and vanilla extract, mixing until well combined. In a separate bowl, whip the heavy cream until you get stiff peaks. Carefully fold this whipped cream into the cream cheese mixture until it’s smooth and fluffy. Then, transfer the cream filling into a piping bag fitted with a round tip.
4. Assemble the Tart:
Now it’s time to assemble! Pipe dollops of the cream filling evenly over the cooled tart shell. You can cover the entire surface or leave the center hollow if you want a cute design. Next, take a separate piping bag with a star tip and pipe pink buttercream roses where you’d like them on top.
5. Decorate:
Let’s make this tart beautiful! Arrange the pastel-colored candy eggs on top, filling in the center hollow area if you chose to make one. Carefully place the white chocolate bunny ears, decorated with sprinkles, at the top “ear” section of the bunny. Sprinkle small candy flowers and butterfly shapes around the cream dollops, and finally, garnish with edible flowers for an extra touch of elegance. If you want to go glam, add a little edible gold leaf or glitter!
6. Serve:
Finally, chill your masterpiece in the refrigerator for at least 1 hour before serving. This allows the cream to set nicely. When you’re ready to serve, slice carefully and enjoy your festive Easter Bunny Cream Tart!
Happy Easter and enjoy your delightful dessert!
Can I Use a Different Type of Flour for the Tart Shell?
Yes, you can use almond flour or gluten-free flour for a variation. Just keep in mind that gluten-free flour might require a binding agent, such as xanthan gum, to maintain the structure.
How Should I Store Leftovers?
Store any leftover tart in the refrigerator for up to 3 days, covered with plastic wrap or in an airtight container. The filling stays fresh, but make sure to consume it within this timeframe for the best texture and flavor.
Can I Make the Tart Shell Ahead of Time?
Absolutely! You can prepare the tart shell a day in advance. Just bake it, let it cool completely, and then store it wrapped in plastic wrap at room temperature until you’re ready to fill it.
What Can I Use Instead of Cream Cheese in the Filling?
If you’re looking for a substitute, whipped mascarpone or ricotta cheese can work well for a lighter filling. Just make sure to adjust the sugar based on your sweetness preference!