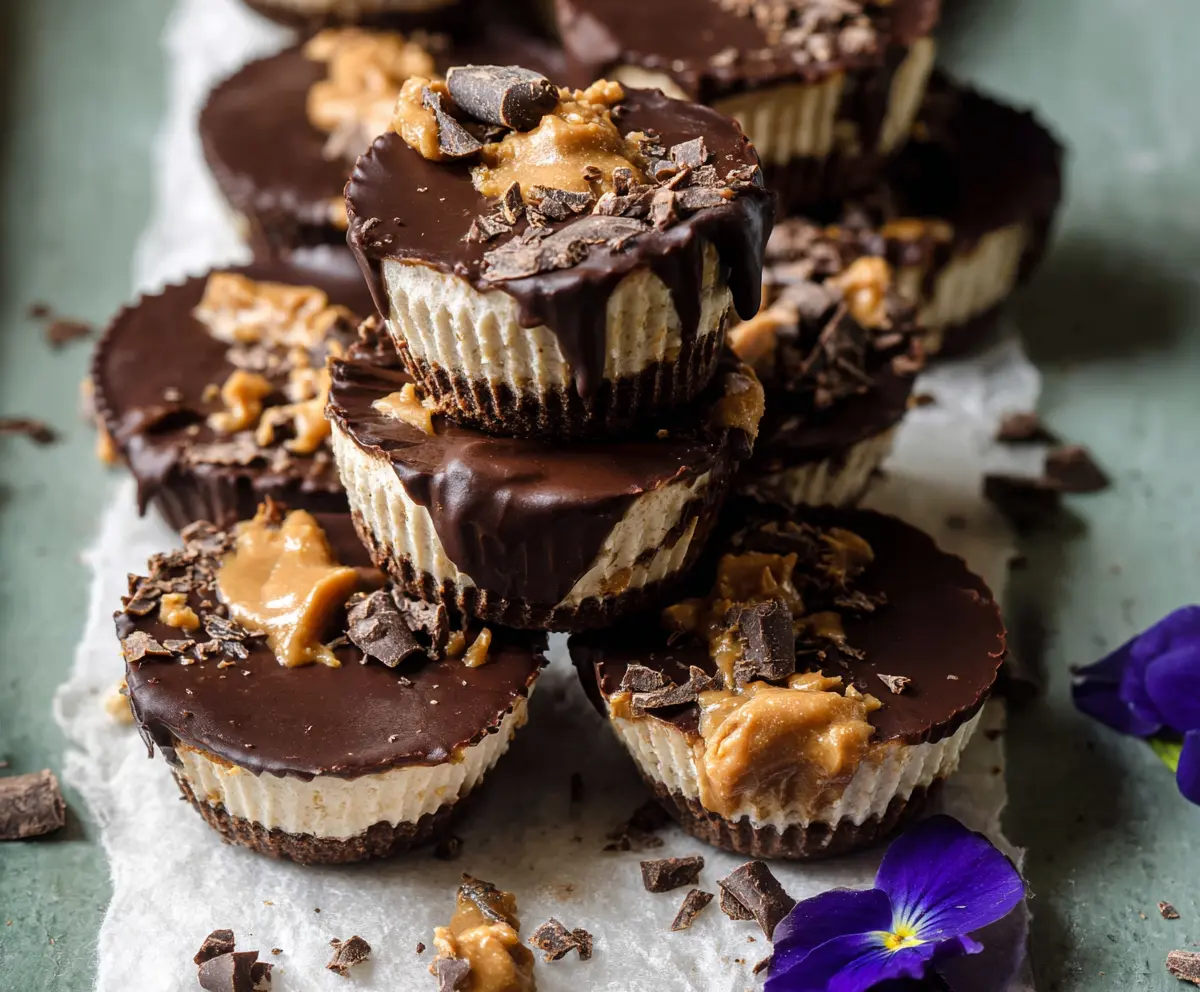
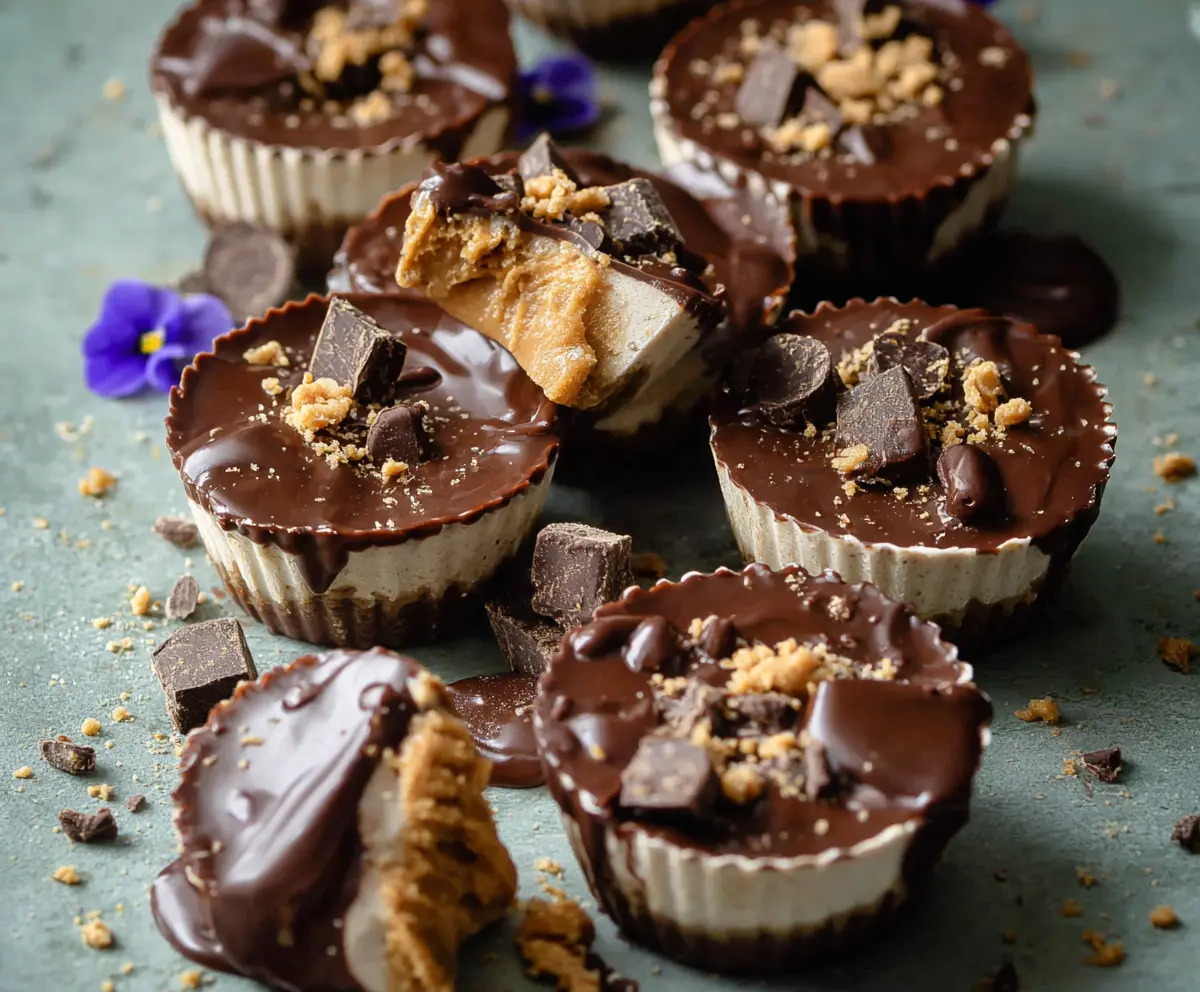
These Healthy Frozen Peanut Butter Greek Yogurt Cups are a tasty treat! They mix creamy Greek yogurt with rich peanut butter, then top them off with chocolate goodness.
Making these is super simple, and they’re a great snack to cool down on hot days! I love popping a few in my bag for a quick sweet boost anytime. Yum! 🥜🍫
Key Ingredients & Substitutions
Greek Yogurt: Plain Greek yogurt gives these cups their creamy texture. I recommend using full-fat or 2% for creaminess, but non-fat works too if you’re watching calories.
Peanut Butter: Natural peanut butter is best. Smooth blends well, while crunchy gives a nice texture. If you have a nut allergy, sunflower butter can be a great swap!
Honey or Maple Syrup: Both add sweetness. Use honey for a richer flavor, but if you prefer vegan options, maple syrup is perfect. Adjust the amount based on your taste.
Crust: Graham cracker crumbs are traditional, but crushed nuts like almonds or pecans make a great gluten-free option. You can also use coconut flour as an alternative if you want a grain-free crust.
Dark Chocolate: Look for chocolate that’s at least 70% cocoa for a rich taste. If dairy-free, choose a suitable vegan chocolate chip that fits your dietary needs.
How Do I Make the Perfect Crust for These Cups?
The crust is pivotal for texture, so get it right! Here’s how:
- Mix graham cracker crumbs (or nuts) with melted coconut oil until they resemble damp sand.
- Press the crumb mixture firmly into the muffin cups to form a solid base. This helps hold the filling in place.
- Freezing the crust for a few minutes sets it well, which prevents it from crumbling when you eat these delicious cups later.
Healthy Frozen Peanut Butter Greek Yogurt Cups With Chocolate Top
Ingredients You’ll Need:
For the Cups:
- 1 cup plain Greek yogurt (preferably full-fat or 2%)
- 1/2 cup natural peanut butter (smooth or crunchy)
- 2 tablespoons honey or maple syrup (adjust for sweetness)
- 1 teaspoon vanilla extract
- 3/4 cup graham cracker crumbs or crushed nuts (for crust)
- 2 tablespoons coconut oil (melted)
- 1/2 cup dark chocolate chips or chopped dark chocolate (70% cocoa or higher)
- Optional: Pinch of sea salt
- Optional toppings: extra peanut butter dollops, chopped dark chocolate pieces or cacao nibs
How Much Time Will You Need?
This recipe will take approximately 15 minutes of active prep time, plus about 2-3 hours to freeze and set. You’ll spend a few minutes mixing and layering, and then just let it set in the freezer. It’s a great make-ahead treat for snacking any day!
Step-by-Step Instructions:
1. Preparing the Muffin Tin:
Start by preparing a muffin tin. You can either line it with paper liners or lightly grease each cup with cooking spray or a bit of coconut oil. This will help the cups come out easily later on.
2. Making the Crust:
In a small bowl, combine the graham cracker crumbs (or your choice of crushed nuts) with melted coconut oil. Mix well until the mixture is crumbly but sticks together when pressed. This creates a nice base for your frozen cups!
3. Assembling the Crust:
Spoon about 1 tablespoon of the crust mixture into each muffin cup. Press down firmly and evenly to form a solid base layer. Once all the cups are ready, place the muffin tin in the freezer to set while you work on the yogurt layer.
4. Preparing the Yogurt Filling:
In a mixing bowl, combine the Greek yogurt, peanut butter, honey (or maple syrup), vanilla extract, and a pinch of sea salt if you like. Mix everything together until it’s smooth and creamy. This is where the magic really happens!
5. Adding the Yogurt Layer:
Once the crusts are set, remove the muffin tin from the freezer. Carefully spoon the Greek yogurt-peanut butter mixture evenly over the crust layer in each cup. Use the back of a spoon to smooth the tops.
6. Freezing the Cups:
Place the cups back in the freezer for at least 30 minutes so they can firm up nicely before adding the chocolate layer.
7. Melting the Chocolate:
While the cups are freezing, melt the dark chocolate chips with a tablespoon of coconut oil. You can do this in a heat-safe bowl over a double boiler or in the microwave, heating in short bursts and stirring until smooth. This will create a delicious chocolate topping!
8. Topping the Cups:
Take the cups out of the freezer after they’ve set. Spoon or drizzle the melted chocolate evenly over each cup’s top to cover the yogurt layer completely. Time for that irresistible chocolate goodness!
9. Adding Optional Toppings:
Before the chocolate fully sets, you can add a small dollop of extra peanut butter on top and sprinkle with chopped dark chocolate pieces or cacao nibs for some extra flair and crunch.
10. Final Freezing:
Return the muffin tin to the freezer for an additional 1-2 hours until the chocolate is completely set and the cups are frozen solid.
11. Serving Your Cups:
When you’re ready to enjoy, take the cups out of the freezer and let them thaw for about 5-10 minutes to soften slightly. This helps achieve the best texture when you bite into them!
12. Enjoy!
These healthy frozen peanut butter Greek yogurt cups are sure to delight! They’re a refreshing, nutritious snack that you can keep stored in the freezer in an airtight container or wrapped for up to 2 weeks.
Can I Use Non-Dairy Yogurt in This Recipe?
Absolutely! If you’re looking for a dairy-free option, feel free to substitute plain non-dairy yogurt, like almond or coconut yogurt. Just check that it’s unsweetened to maintain the balance of flavors!
How Do I Store Leftover Cups?
Store any leftover frozen cups in an airtight container in the freezer. They’ll stay fresh for up to 2 weeks. Just take them out and let them thaw for a few minutes before enjoying again!
Can I Use Other Nut Butters?
Yes! While peanut butter adds a wonderful flavor, you can substitute it with other nut or seed butters, like almond butter, cashew butter, or sunflower seed butter, depending on your preference or dietary needs.
What If I Don’t Have Graham Crackers?
No worries! If you don’t have graham crackers, you can easily swap them for crushed nuts, oats, or even whole grain cookies to create a different crust texture. Just make sure to mix with melted coconut oil for binding!