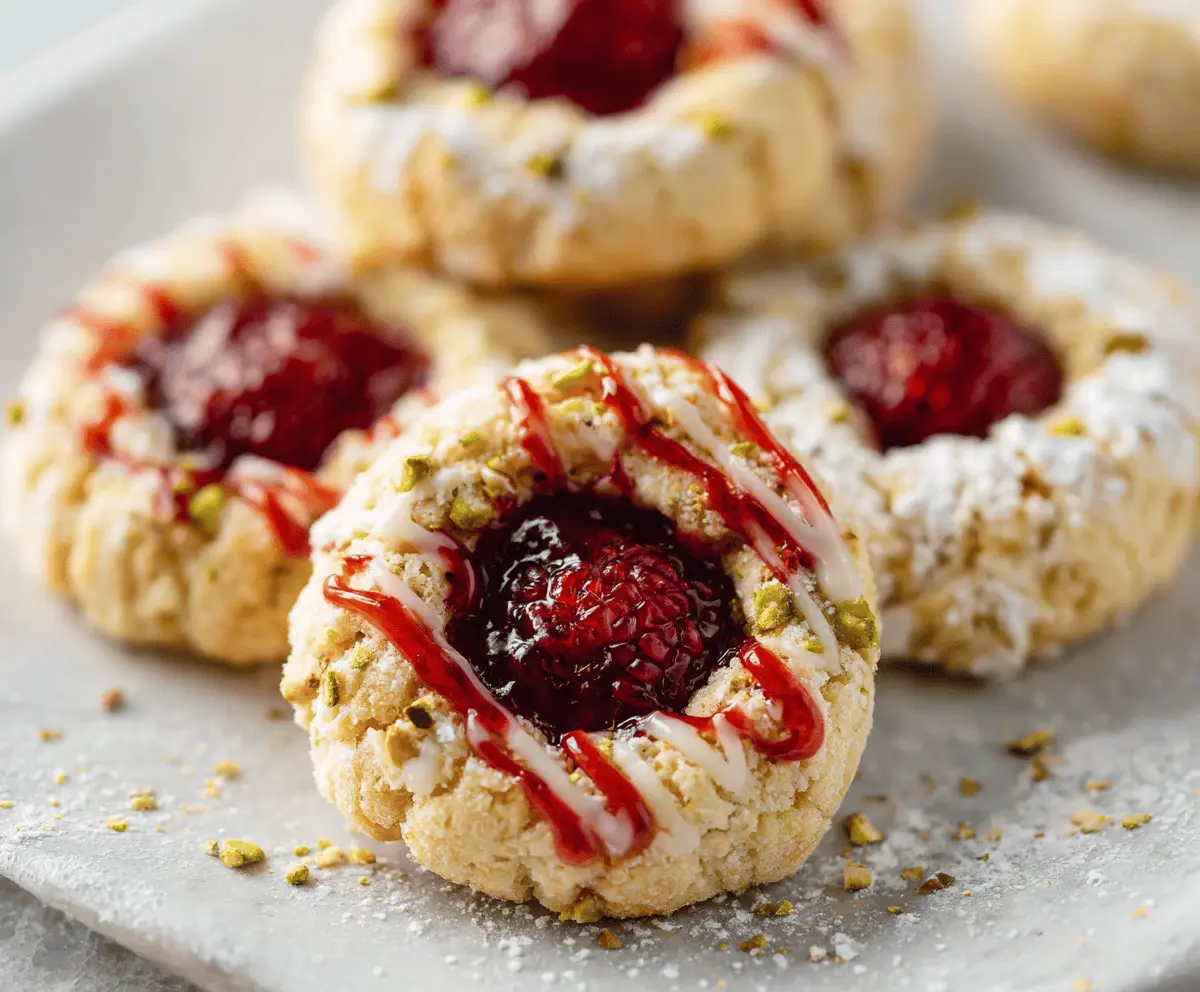
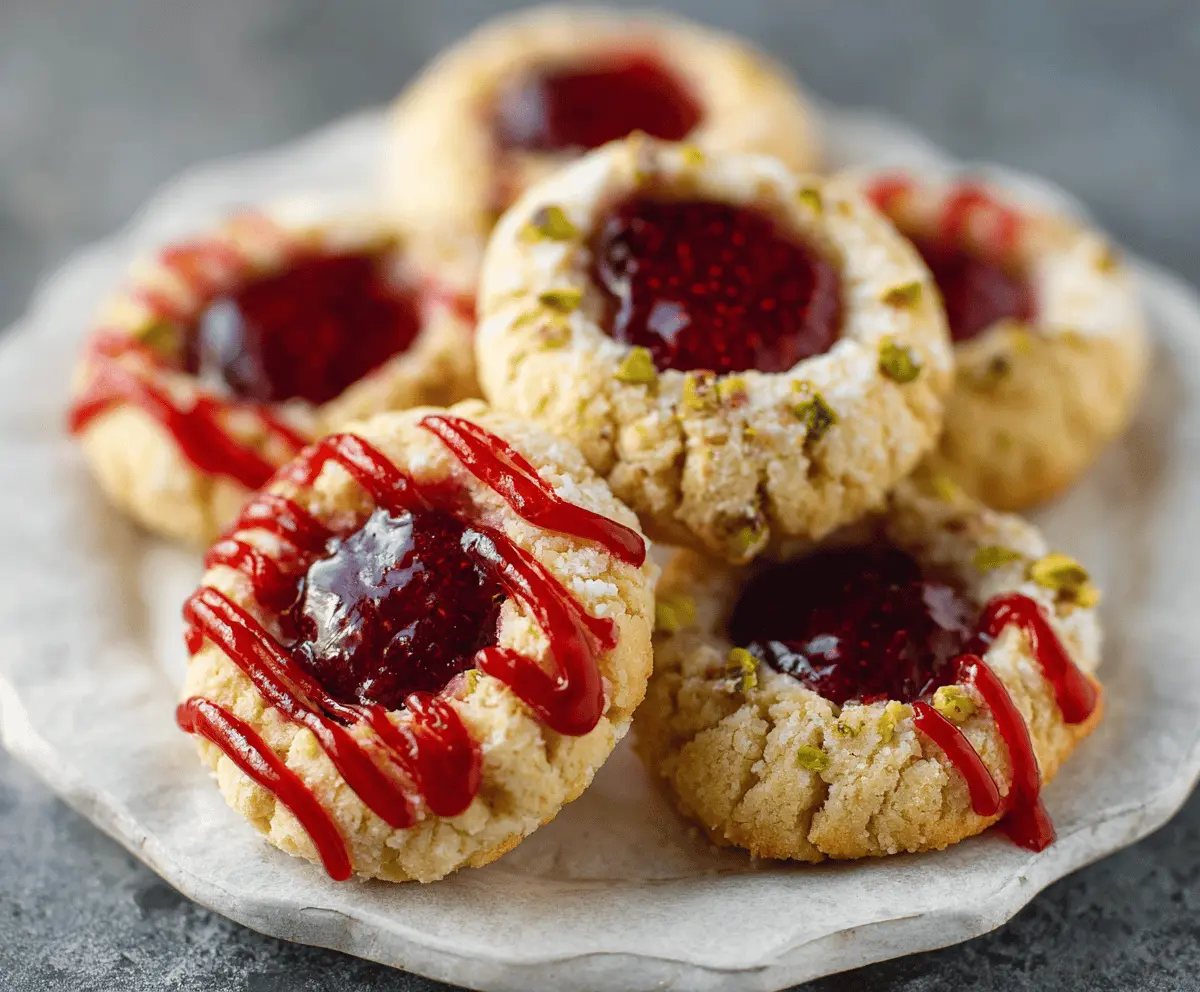
These Italian Raspberry Thumbprint Cookies are soft, sweet, and oh-so-delicious! With a buttery base and a tart raspberry center, they’re perfect for sharing or enjoying solo!
You know, I always end up eating more than I plan because they’re just that tasty! Dip them in a little chocolate for an extra treat—trust me, it’s worth it! 😋
Key Ingredients & Substitutions
Unsalted Butter: This is key for a rich flavor. If you want to lighten it up, use coconut oil for a dairy-free option. Be mindful of the consistency since butter is usually firmer than oil.
Granulated Sugar: A basic sweetener, but you can swap in brown sugar for a bit more depth in flavor. It will also give the cookies a chewy texture.
Egg: This helps bind the dough together. If you’re vegan or allergic, try a flax egg (1 tablespoon ground flaxseed + 2.5 tablespoons water) or applesauce for moisture.
All-Purpose Flour: The main structure of these cookies. If you need gluten-free, a 1:1 gluten-free flour blend works well. I recommend checking the packaging to ensure it includes xanthan gum.
Pistachios: These add a nice crunch. For a different taste, you can use chopped walnuts or almonds, or completely skip them for nut-free cookies.
Raspberry Jam: The flavor star of the show! If you prefer something less sweet, try using a tart homemade raspberry sauce or even another type of jam, like blackberry or apricot.
What’s the Best Way to Create Thumbprints in Cookies?
Creating the perfect thumbprint indent is crucial for holding the jam. Here’s how to do it right:
- Don’t press too hard! You want a deep enough space for the jam, but not so deep that the cookie crumbles.
- Use your thumb or the back of a teaspoon—both work well. The back of a tablespoon can keep things tidy.
- Make sure to do this before baking. This way, the cookies can rise around the edges while keeping the jam intact.
And if you find the dough sticking to your hands, lightly dust them with flour. This little trick helps keep things smooth and tidy!
How to Make Italian Raspberry Thumbprint Cookies
Ingredients You’ll Need:
For the Cookie Base:
- 1 cup (2 sticks) unsalted butter, softened
- 3/4 cup granulated sugar
- 1 large egg
- 1 teaspoon pure vanilla extract
- 2 cups all-purpose flour
- 1/4 teaspoon salt
For the Coating and Filling:
- 1/2 cup finely chopped pistachios (optional, for coating)
- 1/3 cup raspberry jam or preserves
- Whole fresh raspberries (enough for one per cookie; about 20-24)
- Powdered sugar, for dusting
- Optional: icing sugar glaze (mix powdered sugar with a little milk or lemon juice for drizzling)
How Much Time Will You Need?
This recipe will take about 15 minutes for preparation and another 12-15 minutes for baking, plus some cooling time. Overall, you should plan for about 30-45 minutes from start to finish, not including cooling time!
Step-by-Step Instructions:
1. Preheat the Oven:
Start by preheating your oven to 350°F (175°C) and lining two baking sheets with parchment paper. This will prevent the cookies from sticking and make cleanup easier.
2. Cream the Butter and Sugar:
In a large bowl, cream together the softened butter and granulated sugar using a mixer or a whisk until it’s light and fluffy—this should take about 3-5 minutes. It’s important to get enough air into the mixture to help your cookies rise!
3. Add Egg and Vanilla:
Next, mix in the egg and vanilla extract until everything is well combined. Feel free to scrape down the sides of the bowl to make sure everything is mixed evenly.
4. Combine Dry Ingredients:
Gradually add the flour and salt to the mixture, stirring just until combined. The dough should be soft but workable, so don’t overmix!
5. Prepare for Coating:
If you’re using pistachios, put them in a shallow bowl. Take tablespoon-sized portions of the dough and roll them into balls, then roll the balls in the chopped pistachios to coat the outside.
6. Shape the Cookies:
Place the coated dough balls onto the prepared baking sheets, spacing them about 2 inches apart. Now, use your thumb or the back of a spoon to press down gently in the center of each dough ball to create a deep indentation.
7. Fill with Raspberry Jam:
Carefully fill each indentation with about 1/2 teaspoon of raspberry jam. Be generous but don’t overfill—just enough to create a delightful burst of flavor!
8. Bake the Cookies:
Pop the trays into the preheated oven and bake for 12-15 minutes, or until the edges of the cookies are lightly golden. Your kitchen will start to smell amazing!
9. Add Fresh Raspberries:
As soon as you take the cookies out of the oven, gently press one fresh raspberry into the center of each cookie, adjusting the jam if necessary.
10. Cool the Cookies:
Let the cookies cool on the baking sheet for about 5 minutes, then transfer them to a wire rack to cool completely. This helps maintain their shape and texture.
11. Finish with Powdered Sugar:
Once cooled, dust the cookies lightly with powdered sugar for a pretty finish. If you want a bit more flair, drizzle some icing sugar glaze over them!
12. Serve and Enjoy!
These Italian Raspberry Thumbprint Cookies are now ready to be enjoyed! They make for a delightful treat at any gathering and are perfect with coffee or tea. Enjoy indulging in every bite!
Can I Use a Different Type of Jam?
Absolutely! While raspberry jam is traditional, you can substitute with any fruit jam or preserves you prefer, such as strawberry, apricot, or even lemon curd for a zesty twist.
How Should I Store Leftover Cookies?
Store any leftover cookies in an airtight container at room temperature for up to 5 days. To keep them extra fresh, you can place a slice of bread in the container—this helps maintain moisture and softness!
Can I Freeze These Cookies?
Yes, you can! Freeze the unbaked dough balls rolled in pistachios on a baking sheet until solid, then transfer them to a zip-top bag. When you’re ready to bake, just add an extra couple of minutes to the baking time while keeping an eye on them.
How Can I Make These Cookies Gluten-Free?
To make the cookies gluten-free, simply use a 1:1 gluten-free flour blend. Make sure it includes xanthan gum for better texture. Follow the same instructions, and they should turn out great!