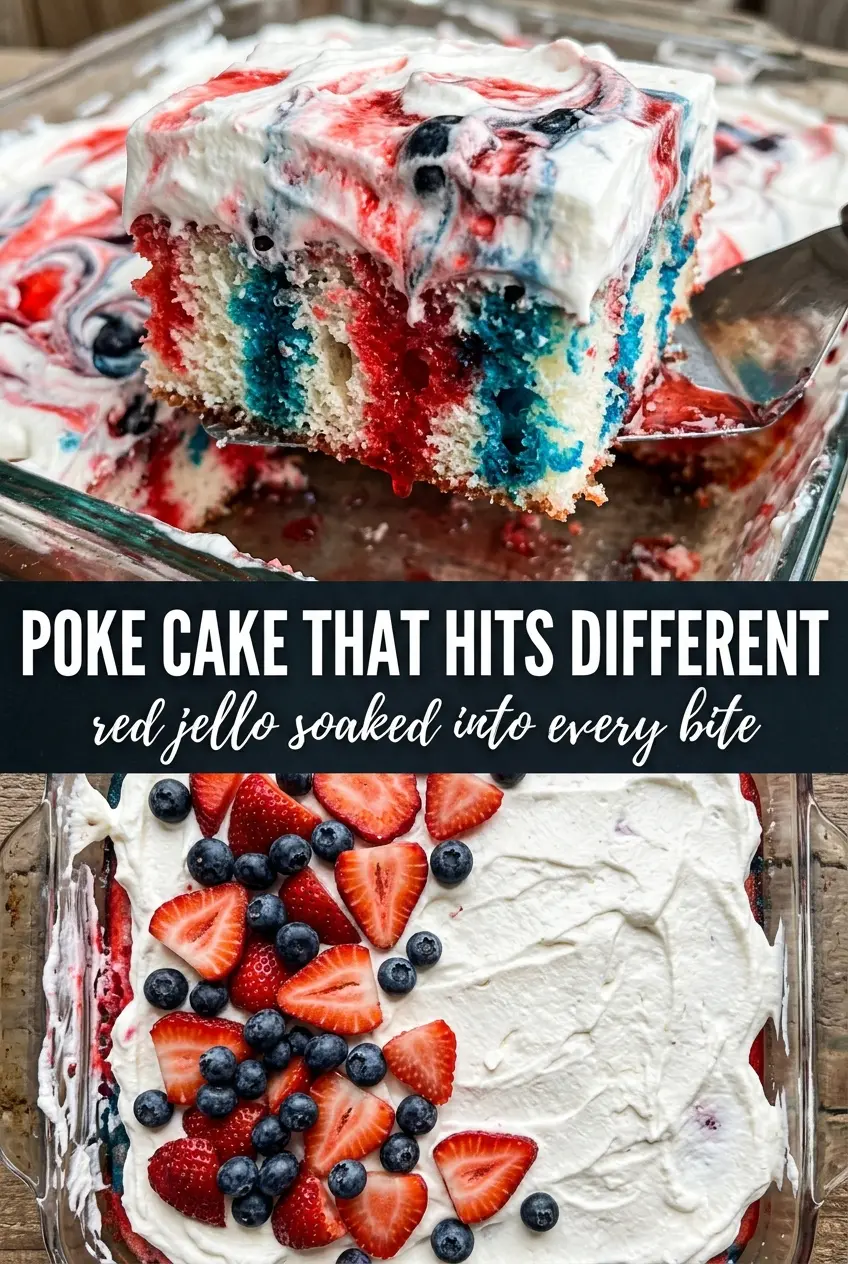
Red, white, and blue poke cake is the kind of dessert that disappears in clean, colorful squares before the rest of the party has even found the serving spoon. The cake stays soft and fluffy, but every bite picks up those bright strawberry and berry blue streaks that run straight through the crumb. The whipped topping keeps it light on top, and the fruit and sprinkles give it that finished, festive look without turning the whole thing heavy.
What makes this version work is the timing. The cake needs to be warm enough for the Jell-O to sink into the holes, but not hot enough that it turns the crumb soggy. Pouring the red and blue mixtures over separate halves keeps the colors sharp and the stripes visible when you slice it. You get a cake that looks dramatic on the plate and still tastes like an easy, familiar dessert.
Below, I’ll walk through the one detail that keeps the colors bold, the ingredient choices that matter most, and the small tricks that help the cake hold its shape when you serve it.
The Jell-O soaked all the way through and the stripes stayed bright after chilling. I followed the timing exactly, and the cake sliced clean without falling apart.
Like this red, white, and blue poke cake? Save it to Pinterest for the next time you need a colorful sheet cake with bright Jell-O stripes and a whipped topping finish.
The Trick to Keeping the Colors Separate in a Poke Cake
The biggest mistake with poke cakes is flooding the whole pan and hoping the colors sort themselves out. They won’t. If you pour both Jell-O mixtures across the full cake, the red and blue bleed together and you lose the clean striped look that makes this dessert fun in the first place. Dividing the cake down the middle keeps each color where it belongs and gives you that sharp reveal when the slices come out.
The other detail that matters is the cake temperature. A warm cake drinks in the Jell-O mixture; a hot cake can get mushy around the holes, and a fully cooled cake won’t absorb as evenly. Those holes need to be close enough together that the flavor reaches every bite, but not so close that the cake falls apart. One-inch spacing is the sweet spot.
What Each Ingredient Is Actually Doing in This Cake

- White cake mix — This gives you a neutral base that lets the red and blue colors stand out. A homemade white cake works too, but the box mix is sturdy, soft, and predictable, which matters when you’re poking holes and soaking it with liquid.
- Strawberry and berry blue Jell-O — These are the colors and the flavor. Don’t swap in juice here; it won’t set the same way and the stripes won’t hold their shape. Using two separate flavors also keeps the red and blue layers distinct instead of muddy.
- Whipped topping — Cool Whip spreads smoothly over a chilled cake and holds its shape better than loose whipped cream. If you want to use homemade whipped cream, pile it on right before serving because it won’t stay as neat for long.
- Fresh strawberries and blueberries — These aren’t just decoration. They echo the colors inside the cake and give each slice a fresh bite at the end, which helps balance the sweetness from the Jell-O and frosting.
How to Build the Jell-O So It Soaks In Instead of Sitting on Top
Baking the Base
Bake the white cake in a 9×13 pan and let it cool for about 15 minutes before poking. That short rest is important: the cake should be set enough to hold its structure, but still warm enough to absorb the Jell-O. If it’s too hot, the holes can collapse and the crumb gets gummy. If it’s completely cool, the gelatin won’t seep in as evenly.
Poking the Holes
Use the handle of a wooden spoon and poke straight down about 1 inch apart all over the cake. The holes should go deep enough to carry the filling through the middle, not just the surface. Keep the spacing even so each slice gets the same amount of color and flavor. If you make the holes too large, the cake can look torn once it chills.
Pouring the Red and Blue Layers
Dissolve each Jell-O flavor in boiling water first, then stir in the cold water. Pour the red mixture slowly over one half of the cake and the blue mixture over the other half, aiming for the holes rather than the surface at random. A slow pour gives the liquid time to travel down instead of pooling. If one side looks a little wetter at first, don’t worry — the fridge will even it out as the gelatin sets.
Chilling and Finishing the Top
Refrigerate the cake for at least 2 hours so the Jell-O firms up inside the crumb. Spread the whipped topping only after the cake is fully chilled, or it can smear and mix with the still-soft gelatin underneath. Add the sprinkles and fruit at the end so the top stays bright and fresh. Slice with a sharp knife wiped clean between cuts for the neatest stripes.
How to Adapt This Cake Without Losing the Red, White, and Blue Look
Use homemade whipped cream instead of Cool Whip
Whipped cream gives you a fresher dairy finish, but it softens faster than stabilized topping. If you go this route, spread it close to serving time so it holds its shape and doesn’t loosen over the chilled cake.
Make it gluten-free
Use a gluten-free white cake mix and follow the package directions exactly, since those batters can behave differently from standard mixes. The Jell-O filling and topping already fit well with that swap, so the texture change mostly comes from the cake itself.
Swap the fruit garnish for a cleaner finish
If you want neater slices for a party tray, skip the fresh fruit on top and use only star sprinkles. You lose a little of the fresh contrast, but the cake is easier to cover, transport, and cut without berries sliding off the whipped topping.
Make it ahead for a crowd
You can bake and chill the cake a day ahead, then add the whipped topping, sprinkles, and fruit the day you serve it. That keeps the top looking fresh and prevents the garnish from weeping into the frosting.
Storage and Reheating
- Refrigerator: Store covered for up to 4 days. The cake stays moist, but the whipped topping will soften a bit as it sits.
- Freezer: Freeze only the unfrosted, Jell-O-soaked cake if you need to plan ahead. Wrap it tightly and thaw in the refrigerator before adding the topping and garnish.
- Reheating: Don’t reheat this cake. It’s meant to be served cold, and warmth will melt the topping and loosen the set Jell-O inside the crumb.
Answers to the Questions Worth Asking
Red, White and Blue Poke Cake
Ingredients
Equipment
Method
- Preheat the oven and bake the white cake in a 9x13 pan according to package directions, then let it cool for 15 minutes.
- Using the handle of a wooden spoon, poke holes all over the cake about 1 inch apart so the filling can seep through.
- Dissolve the strawberry Jell-O in 1 cup boiling water, stir in 1/2 cup cold water, then pour slowly over the left half of the cake so it soaks into the holes.
- Dissolve the blue Jell-O in 1 cup boiling water, stir in 1/2 cup cold water, then pour over the right half of the cake to create distinct red and blue stripes.
- Refrigerate the cake for at least 2 hours until the Jell-O is fully set inside the cake.
- Spread the whipped topping evenly over the top of the chilled cake, then decorate with red and blue star sprinkles and fresh strawberries and blueberries before serving.