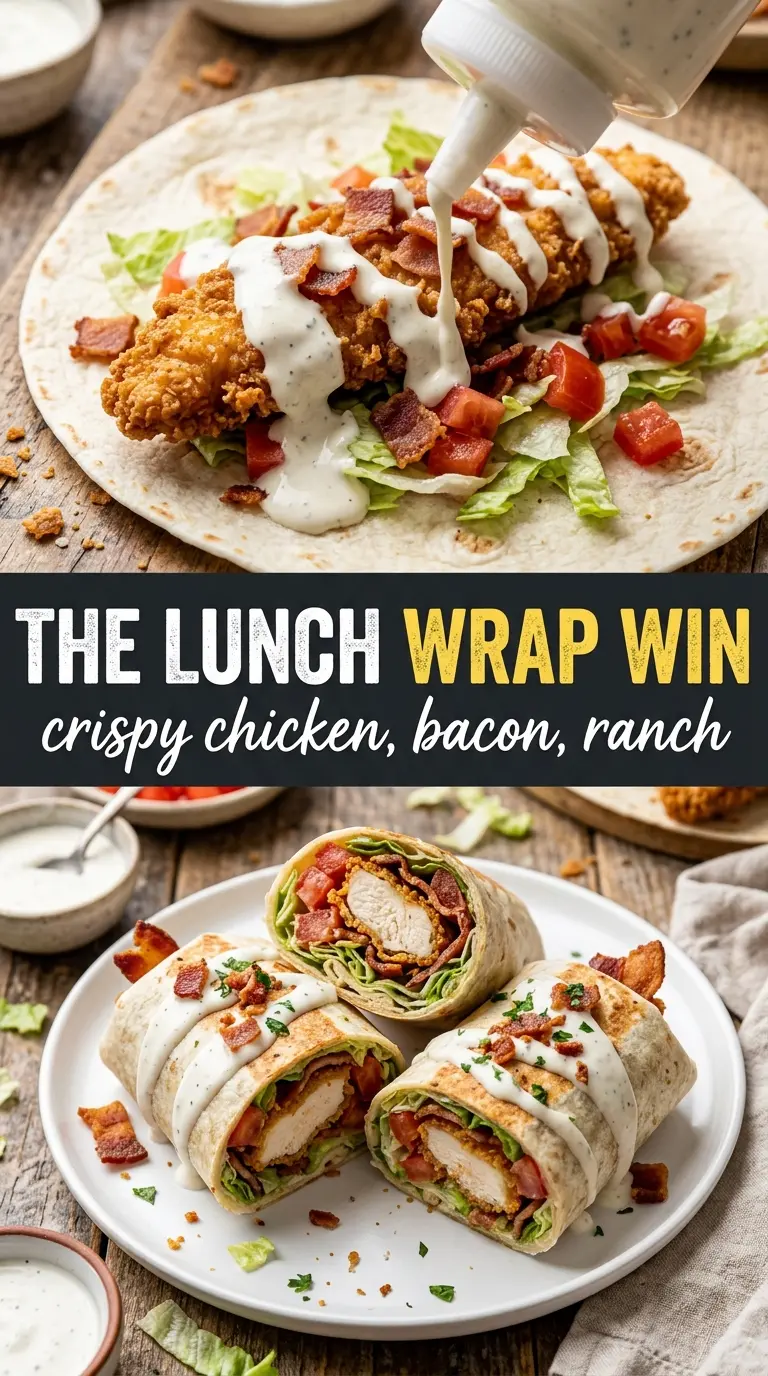
Crispy chicken, smoky bacon, and cool ranch belong together in a wrap that actually holds its shape. The tortilla gets toasted just enough to pick up color and a little crunch on the outside, while the filling stays layered and distinct instead of collapsing into a soggy bundle. What you get in the end is a handheld lunch or dinner with enough texture to keep every bite interesting.
The part that makes this version work is the way each layer earns its place. The chicken gets a short buttermilk soak so the breading clings, then it goes into a panko-Parmesan coating that fries up with a crisp edge. Ranch goes on the tortilla first as the glue, but the lettuce and tomatoes sit between the sauce and the hot chicken so the wrap stays fresh instead of turning soft before you finish eating it.
Below, I’ve included the little details that matter most: how to keep the chicken crunchy, how to roll the wrap so it seals cleanly, and what to change if you need a lighter or lower-carb version.
The chicken stayed crunchy even after I rolled the wraps, and the ranch didn’t make everything soggy. I also liked that the bacon stayed crisp because the wrap was toasted seam-side down at the end.
Love a wrap with real crunch? Save this crispy chicken bacon ranch wrap for the nights when you want a toasted, saucy handheld meal that still eats cleanly.
The One Move That Keeps the Wrap Crispy Instead of Soggy
The fastest way to ruin a chicken wrap is to pile wet ingredients on top of hot breading and roll it up immediately. Steam softens the coating fast, and ranch sitting directly against the chicken only speeds that up. This wrap avoids that by building in a specific order: ranch on the tortilla, lettuce and tomatoes next, then chicken and bacon, with the warm filling tucked into the middle where it’s protected.
Toasting the finished wrap seam-side down matters just as much. That brief skillet time seals the tortilla and gives the outside a light crunch, but it also helps the whole thing hold together when you cut it. If you skip that last minute in the pan, the wrap tastes fine, but it won’t give you those clean halves with the filling standing up the way it should.
- Chicken tenders or thin breasts — Thin pieces cook fast and evenly, which keeps the breading from overbrowning before the center hits 165°F. If you use chicken breasts, pound them to an even thickness so you don’t end up with dry edges and an underdone middle.
- Buttermilk — This gives the coating something tangy and slightly thick to cling to. Plain milk won’t grab the breading the same way; if that’s all you have, add a spoonful of yogurt or a splash of lemon juice and let it sit a few minutes.
- Panko and Parmesan — Panko brings the crunch, while Parmesan adds salt and a toasted edge that regular breadcrumbs can’t match. Finely grated Parmesan works best here because it blends into the coating instead of clumping.
- Ranch dressing — Use a thick ranch, not a thin pourable one. Thin dressing spreads fast and can make the tortilla slippery, while thicker ranch stays put and acts like a barrier between the tortilla and the fillings.
- Flour tortillas — Large, soft tortillas are worth buying here because they roll without cracking. Warm them briefly before filling so they stay flexible; cold tortillas split the second you try to tuck the sides.
What Each Ingredient Is Actually Doing in This Chicken Dish
- Chicken (pat dry for browning) — Room temperature cooks more evenly. Even pieces ensure uniform doneness.
- Oil or butter (the browning medium) — High-heat oil essential for proper searing. Creates pan flavor.
- Seasonings (salt, pepper, spices) — Apply generously. Chicken carries the entire flavor profile.
- Aromatics (garlic, ginger, herbs) — Cook with fat to bloom flavors. Become the foundation.
- Sauce or braising liquid (if using) — This keeps chicken moist. Balance richness with acid.
- Vegetables (if using) — Layer by cooking time so everything finishes together.
- Acid (vinegar, wine, lime, or pineapple) — This brightens and prevents one-dimensional flavor.
- Proper doneness (165°F internal temperature) — Use thermometer for accuracy. Overcooked is dry.
Building the Crunch, Layer by Layer
Soaking and Coating the Chicken
Let the chicken sit in the buttermilk for 15 minutes, no longer needed for this recipe. That short soak gives the coating a tacky surface without turning the chicken watery. Mix the panko, Parmesan, garlic powder, salt, and pepper before dredging so every piece gets the same seasoning. Press the coating on with your hands; if it looks patchy, it will fry patchy.
Frying Until the Crust Turns Deep Gold
Cook the chicken in olive oil over medium-high heat until the outside is deeply golden and the inside reaches 165°F. If the pan is smoking hard, the heat is too high and the crust will darken before the chicken cooks through. If the breading falls off, the pan probably wasn’t hot enough when the chicken went in, or the pieces were moved too soon. Let each side sit undisturbed for 4 to 5 minutes before turning.
Assembling Without Breaking the Tortilla
Warm the tortillas just until they bend easily, then spread the ranch in a thin layer across the center. Add the lettuce first, then tomatoes, cheddar, bacon, and sliced chicken so the hot ingredients don’t sit directly against the tortilla. Keep the filling in a tight horizontal line rather than spreading it edge to edge; that’s what makes the wrap roll neatly instead of bursting at the seam.
Toasting and Slicing for the Best Finish
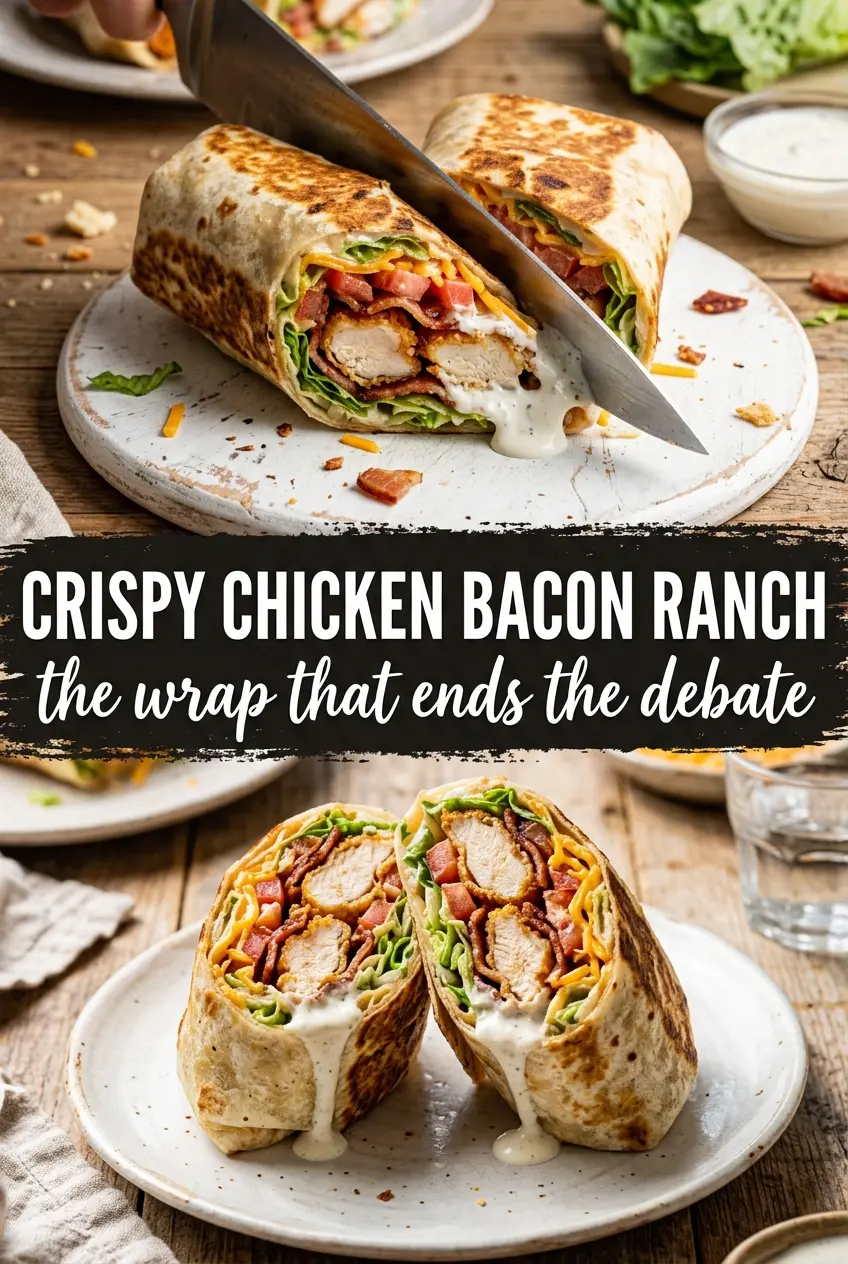
Roll the wrap tightly, place it seam-side down in a skillet, and toast it for about 2 minutes per side. You’re looking for a light golden exterior and a wrap that feels sealed when you lift it with tongs. Let it rest for a minute before slicing so the ranch settles a little and doesn’t spill everywhere. Use a sharp knife and cut on the diagonal for the cleanest cross-section.
How to Make This Wrap Fit the Way You Eat
Make it gluten-free with the right breading and tortilla
Use gluten-free panko and gluten-free flour tortillas. The texture stays close to the original, though the tortilla may brown a little faster, so keep the skillet over medium heat when you toast the wrap. Check labels on the ranch too, since some versions use thickeners with gluten.
Bake the chicken instead of frying it
If you want less hands-on cooking, set the breaded chicken on a wire rack over a sheet pan and bake at 425°F until crisp and cooked through. You won’t get quite the same pan-fried crust, but you’ll still get a good crunch, especially if you spray the coated chicken lightly with oil before baking.
Swap in grilled chicken for a lighter wrap
Use seasoned grilled chicken strips and keep the rest of the build the same. You lose the breaded crunch, so add the toasted tortilla step to give the wrap some texture back. This version tastes cleaner and a little lighter, but the bacon and ranch still keep it satisfying.
Storage and Reheating
- Refrigerator: Store the cooked chicken separately from the lettuce, tomatoes, and ranch for up to 3 days. Assembled wraps soften fast, so keep the parts separate if you want the best texture.
- Freezer: The breaded chicken freezes well, but the finished wrap doesn’t. Freeze the cooked chicken in a single layer, then reheat and build fresh wraps later.
- Reheating: Reheat the chicken in a skillet, air fryer, or oven until hot and crisp again. A microwave will soften the breading and make the wrap soggy, which defeats the whole point of the recipe.
Answers to the Questions Worth Asking
Crispy Chicken Bacon Ranch Wrap
Ingredients
Equipment
Method
- Soak pounded-thin chicken in buttermilk for 15 minutes. Visually, the pieces should look evenly coated and slightly thicker after soaking.
- In a shallow bowl, mix panko breadcrumbs with Parmesan, garlic powder, salt, and pepper. The coating should look evenly speckled throughout.
- Dredge the soaked chicken in the panko mixture, pressing lightly so crumbs cling. The surface should look fully breaded with no bare wet spots.
- Heat olive oil in a skillet over medium-high heat. Once it shimmers, it is ready for frying.
- Cook the breaded chicken for 4-5 minutes per side until golden and cooked through to 165°F. The exterior should be crisp and deeply golden with clear juices after cutting.
- Slice the cooked chicken into strips. You should see a crisp crumb layer along the edges.
- Warm tortillas until pliable. They should flex without cracking when folded.
- Spread ranch dressing across each tortilla. Aim for even coverage so ranch pools when the wrap is cut.
- Layer romaine lettuce, cherry tomatoes, shredded cheddar, bacon, and sliced crispy chicken over the ranch. Distribute the filling so each bite has bacon and chicken.
- Roll tightly and place seam-side down in the skillet. Press lightly so the seam contacts the pan for sealing.
- Toast the wraps seam-side down for 2 minutes per side until golden. The tortillas should look browned and feel crisp when tapped.
- Slice the wraps diagonally and serve immediately with extra ranch. The cut edge should show a layered cross-section with ranch pooling dramatically.