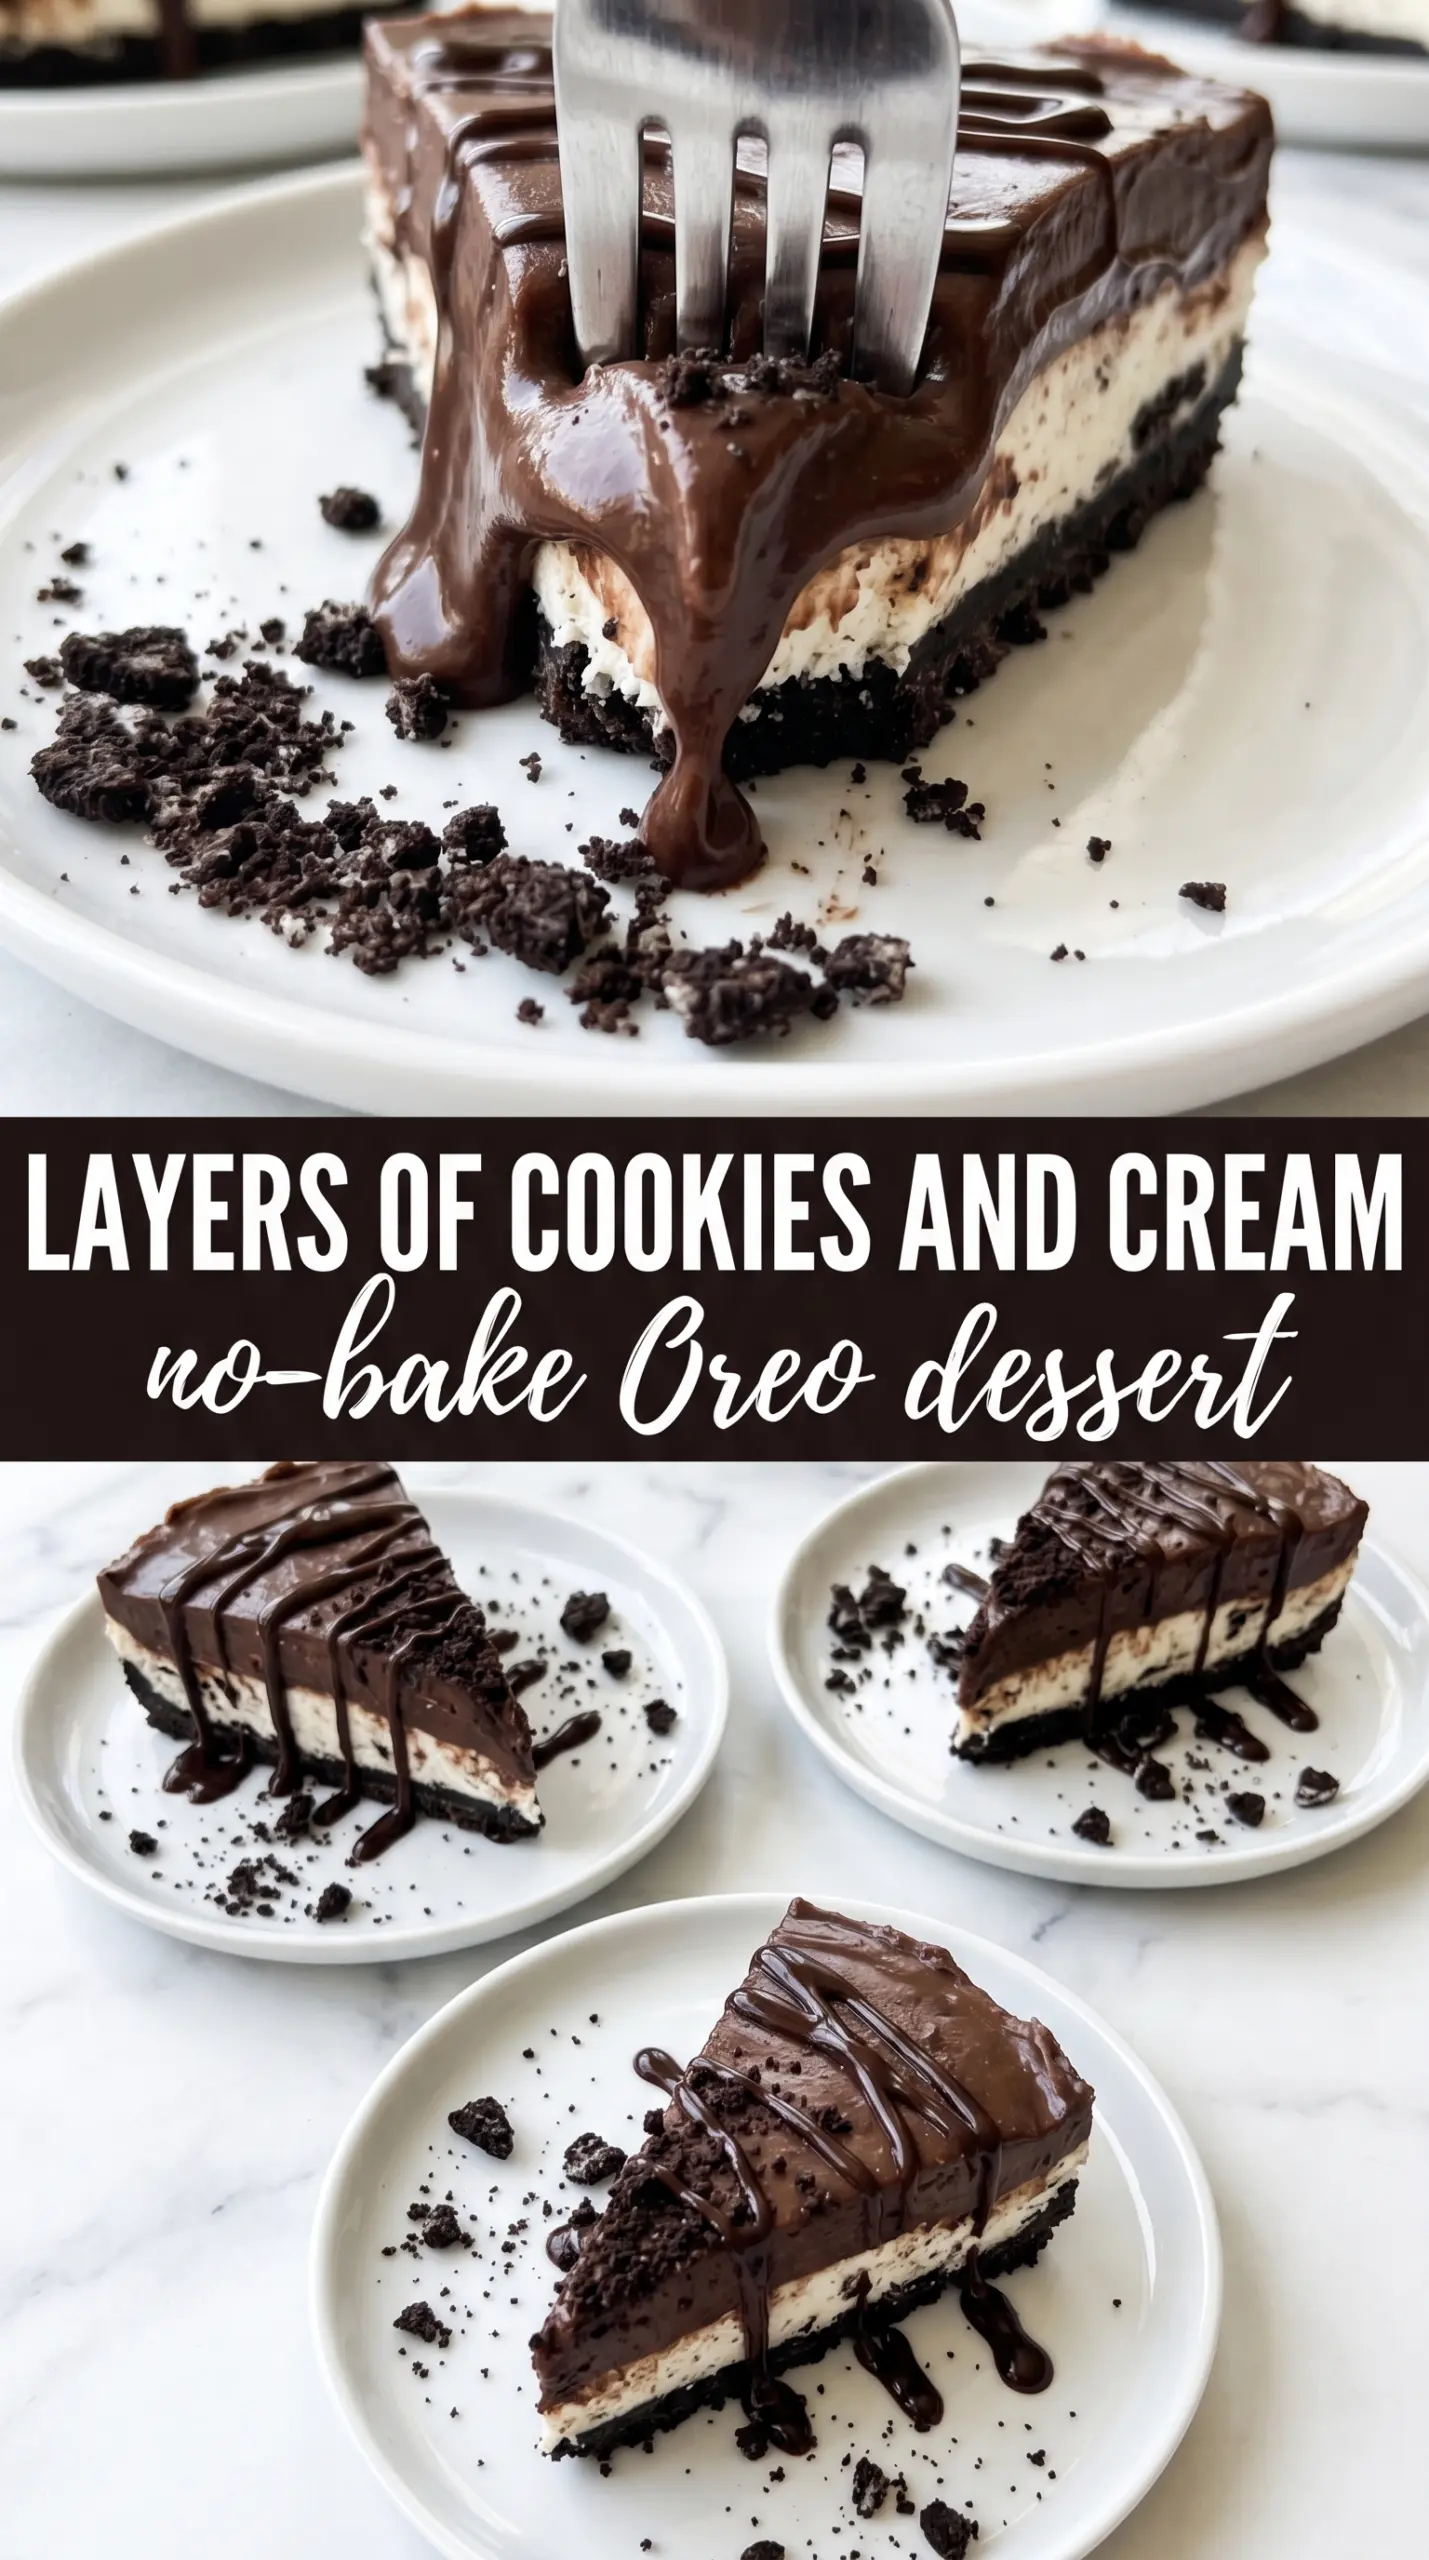
Cold, creamy, and layered with the kind of texture that makes people go back for a second square before they’ve finished the first, this Oreo dessert earns its place at potlucks and family dinners fast. The crust stays sturdy, the chocolate pudding sets up into a clean middle layer, and the cream cheese filling keeps the whole thing from tasting flat or overly sweet. Every bite gives you crunch, cream, and that familiar cookies-and-cream flavor that never gets old.
What makes this version work is the balance. The Oreo crust gets packed in firmly with enough butter to hold together, but not so much that it turns greasy. The cream cheese layer is there for structure and tang, which keeps the whipped topping and pudding from turning the dessert into one soft, one-note pan of sweetness. Using instant pudding matters here, too — it thickens fast enough to support the layers without needing a stove.
Below, I’m walking through the little details that keep the layers distinct, plus the swaps that work when you need to adjust for a different pan, a different topping, or a dessert that needs to sit longer than you planned.
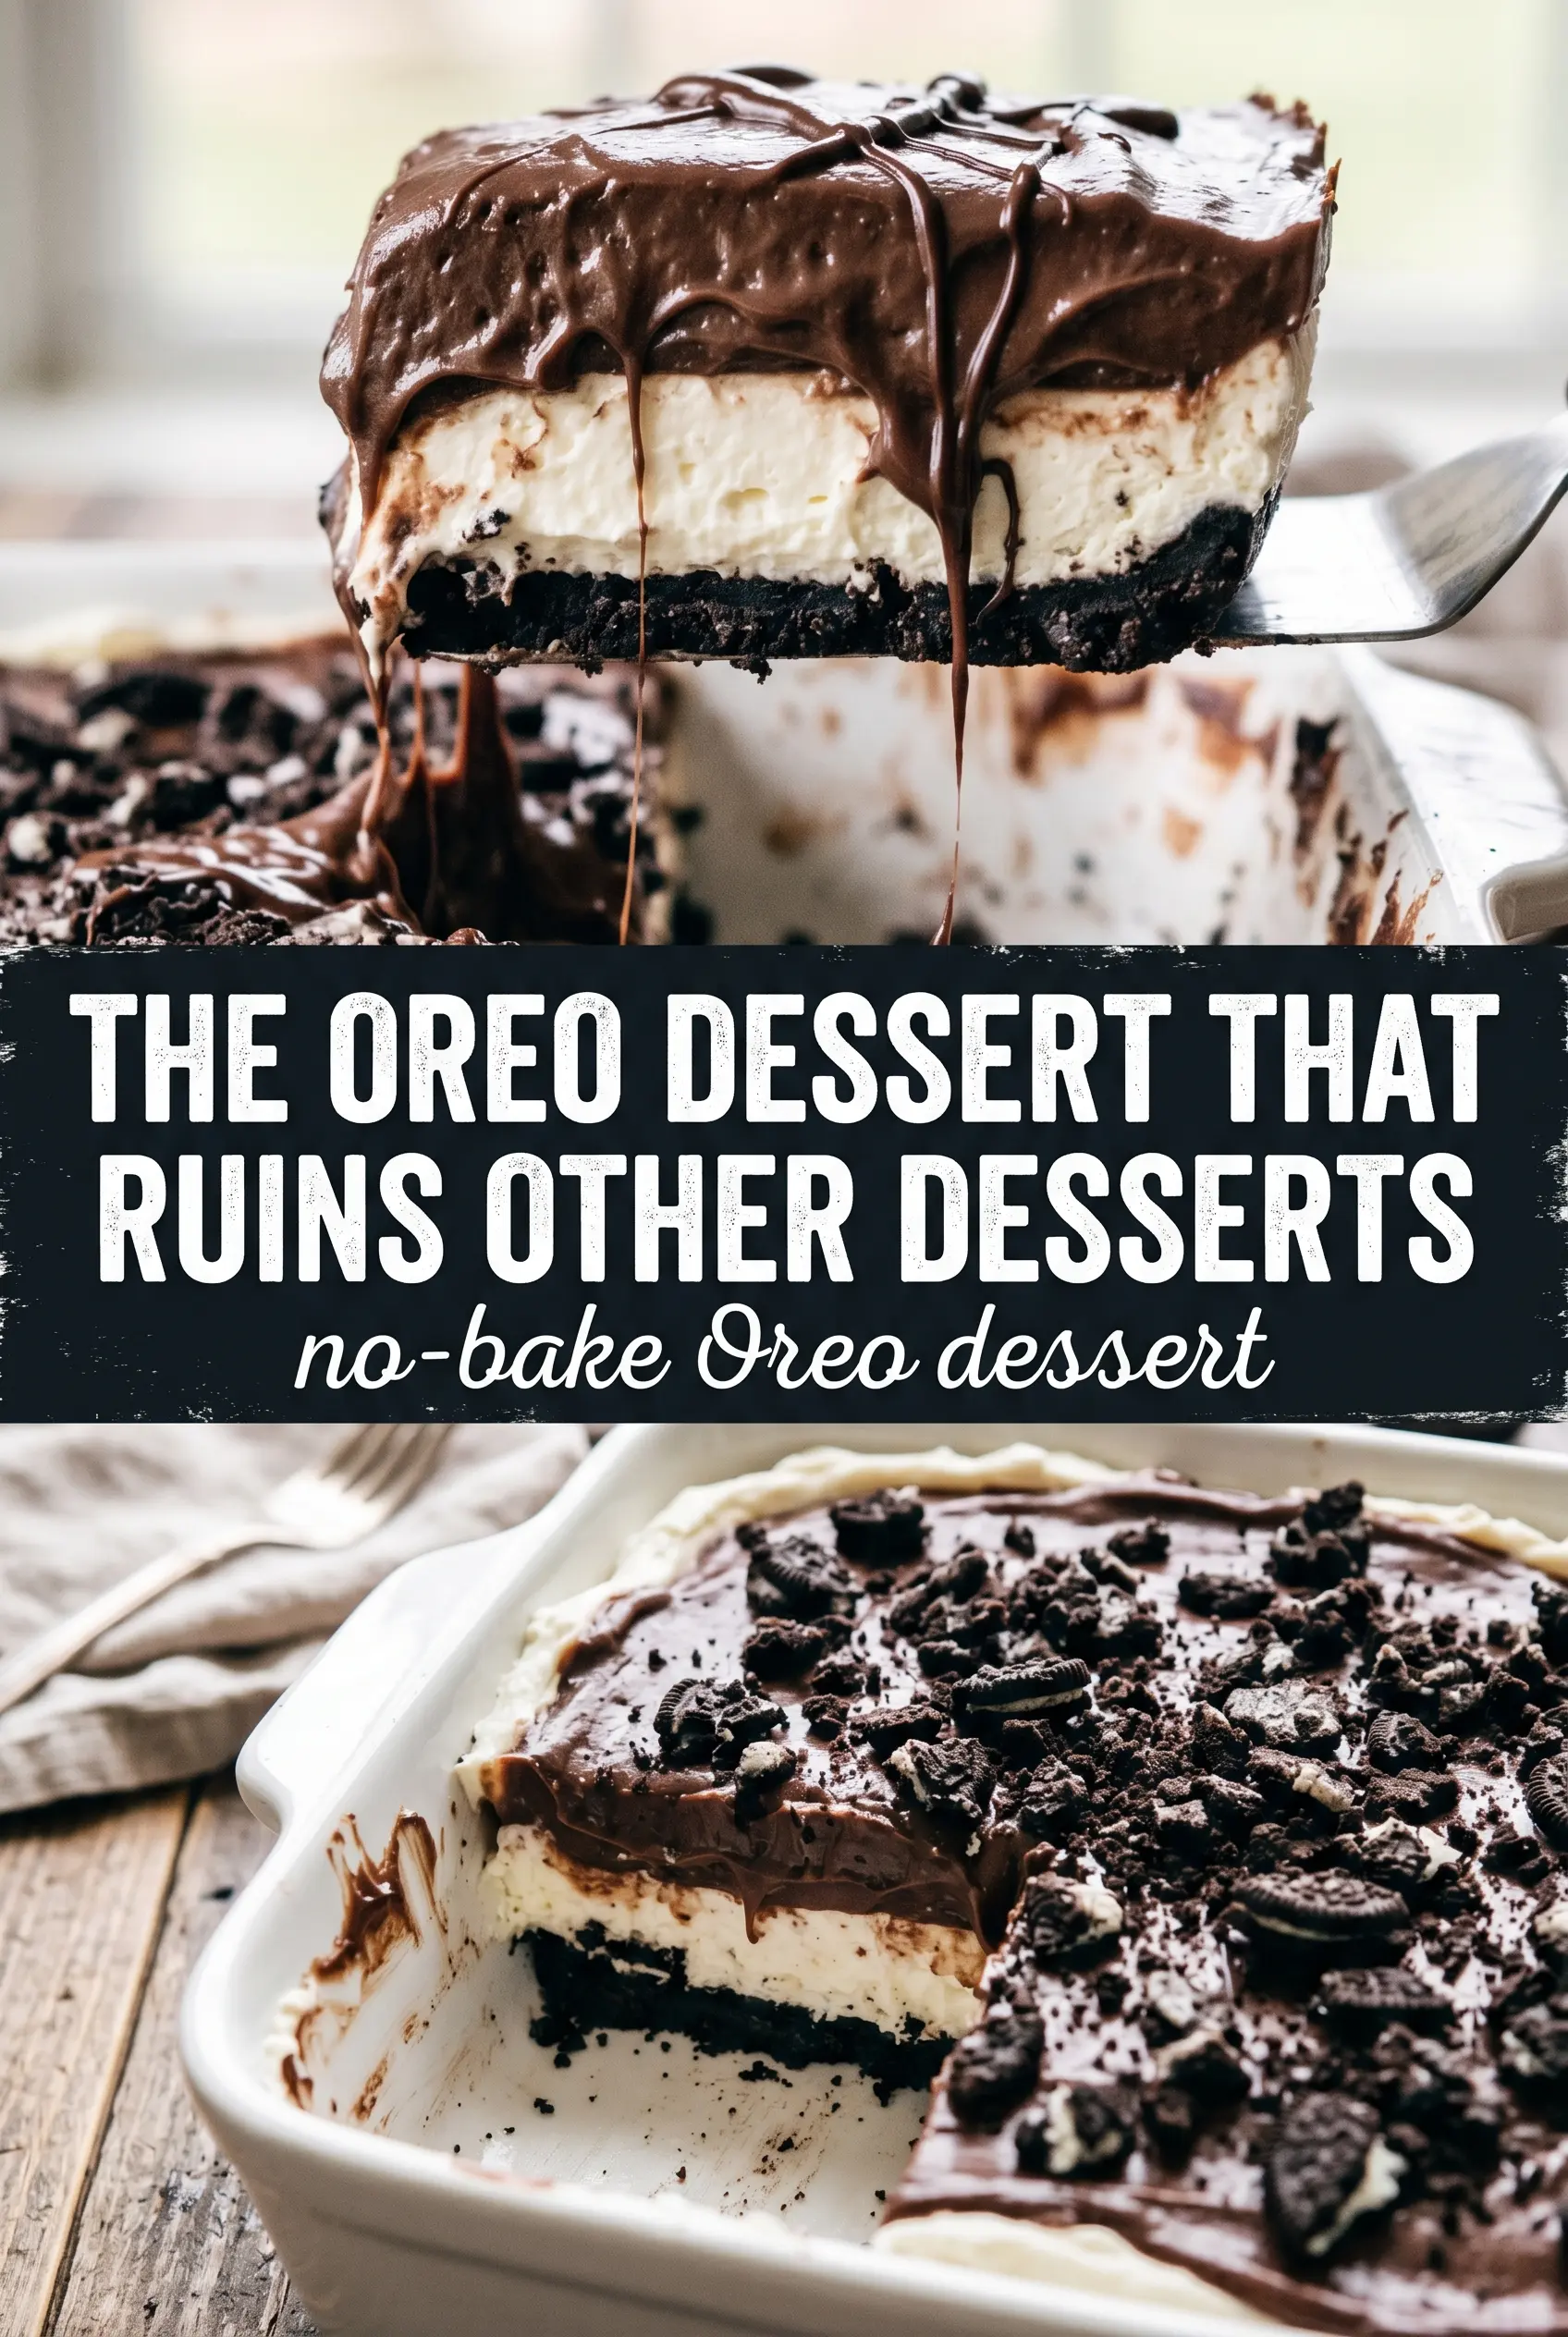
The layers held up beautifully when I sliced it, and the Oreo crust stayed firm instead of turning soggy even after sitting overnight.
This Oreo dessert slices best after a long chill, and the cream cheese layer keeps the whole pan neat and creamy.
The Trick to Keeping the Layers Clean When You Slice It
The biggest mistake with layered Oreo desserts is rushing the chill time. If the pudding and whipped topping haven’t had time to settle, the layers slide into each other and the slices come out soft at the edges. Four hours is the minimum, but overnight gives you the cleanest cut and the best texture.
Pressing the crust firmly into the pan matters more than people think. A loose crust crumbles the second you lift a serving spoon. Pack it down evenly, especially at the corners, so the butter can set the crushed cookies into a stable base before the fillings go on top.
What Each Ingredient Is Actually Doing in This Recipe
- Primary ingredient (the star) — Quality matters most. Choose the best you can find.
- Cooking medium (oil, butter, or broth) — This carries flavors and prevents dryness.
- Seasonings (salt, pepper, spices, herbs) — Layer flavors so nothing overpowers. Build depth gradually.
- Aromatics (garlic, onion, herbs) — Cook with fat to bloom flavors. Become the foundation.
- Supporting ingredients — Complement the main ingredient without overpowering it.
- Sauce or liquid (if applicable) — Brings flavors together. Balance richness with acid.
- Acid (lemon, vinegar, wine, or other) — Brightens and prevents flat-tasting results.
- Final finish (garnish, glaze, or sauce) — Prevents one-dimensional taste and adds visual appeal.
What Each Layer Is Doing in This Dessert
- Oreos for the crust — These bring the chocolate cookie flavor and the structure. Fine crumbs make a tighter crust than chunky crumbs, so pulse or crush them until they look like damp sand.
- Melted butter — This is the glue. You need enough to hold the crumbs together when pressed, but not so much that the base turns heavy or oily.
- Cream cheese — This gives the middle layer body and a slight tang that keeps the dessert from tasting one-dimensionally sweet. It has to be fully softened, or you’ll end up with little lumps that never smooth out.
- Instant pudding — Instant chocolate pudding thickens quickly and stays sliceable. Cook-and-serve pudding won’t set the same way here without extra work, and the texture ends up too loose for clean layers.
- Whipped topping — Folded in gently, it lightens the cream cheese layer and makes the top fluffy instead of dense. If you swap in real whipped cream, use it right away, because it softens faster than whipped topping and won’t hold as long.
Building the Base and Filling Without Smearing the Layers
Pressing the Oreo Crust
Mix the crushed Oreos with the melted butter until every crumb looks evenly moistened, then press the mixture firmly into the bottom of a 9×13 dish. Use the bottom of a measuring cup to compact it into an even layer, paying attention to the edges where loose crumbs tend to collect. A short chill before adding the fillings helps the base set enough to stay put when you spread the cream layer on top.
Whipping the Cream Cheese Layer
Beat the softened cream cheese and powdered sugar until the mixture turns smooth and fluffy with no visible lumps. Fold in the whipped topping by hand so you keep some air in the filling; stirring too hard knocks it flat and makes it dense. Spread it gently over the crust in an even layer, using an offset spatula or the back of a spoon, and avoid dragging crumbs up into the cream.
Setting the Pudding Layer
Whisk the pudding mix and cold milk for the full two minutes so it thickens properly before it hits the pan. If you stop early, it stays loose and can seep into the cream cheese layer instead of sitting on top of it. Once it’s thick, spread it over the cream layer in broad strokes and stop fussing with it — too much smoothing can pull the lower layer up and muddy the stripes.
The Final Chill
Spread the remaining whipped topping over the pudding, then finish with a generous layer of crushed Oreos. Refrigerate the pan for at least four hours, and overnight is even better if you want sharp slices. If the dessert is still jiggly in the center, it needs more time; cutting it early is the fastest way to lose those clean layers you worked for.
How to Adapt This Oreo Dessert for Different Needs
Make it a little richer
Swap the whipped topping in the cream layer for an equal amount of freshly whipped cream, but use it the same day if possible. The flavor gets more dairy-forward and less sweet, while the texture becomes softer and a little less stable than the original.
Gluten-free version
Use gluten-free sandwich cookies in place of the Oreos and crush them the same way. The crust will still hold, but some gluten-free cookies are drier, so check the texture after mixing and add just enough melted butter to make the crumbs pack together.
Dairy-free adaptation
Use dairy-free sandwich cookies, dairy-free cream cheese, plant-based whipped topping, and a non-dairy instant chocolate pudding mix made with the milk listed on the package. The result is still creamy and sliceable, but it will taste a little lighter and less tangy than the original.
Storage and Reheating
- Refrigerator: Store covered for up to 4 days. The crust softens a bit each day, but the dessert still slices well.
- Freezer: This freezes better than you might expect. Wrap the pan tightly or freeze individual squares, then thaw in the refrigerator until just softened.
- Reheating: No reheating needed. Serve it cold straight from the fridge; warming it will collapse the pudding layer and soften the crust too much.
Answers to the Questions Worth Asking
Oreo Dessert (No-Bake Oreo Icebox Cake)
Ingredients
Equipment
Method
- Mix the crushed Oreo cookies and melted butter until evenly combined, then press firmly into the bottom of a 9x13 dish to form a solid crust. Chill in the refrigerator for 15 minutes so the base firms up.
- Beat the softened cream cheese and powdered sugar until smooth, then fold in 1 cup of whipped topping. Spread this mixture over the chilled Oreo crust in an even layer.
- Whisk the instant chocolate pudding mix with the cold whole milk for 2 minutes until thickened. Spread the pudding evenly over the cream cheese layer so it covers edge to edge.
- Spread the remaining 2 cups of whipped topping over the pudding layer to seal in the filling. Sprinkle crushed Oreos generously over the top for a visible crumble cap.
- Refrigerate for at least 4 hours or overnight until fully set, with the top layer looking stable and not jiggly. Cut into squares and serve for distinct, clean layers.